Tag: Utah

  • Away from Home: Arches NP

    Here is chapter 3 from our trip to Southern Utah last month. If you missed the other chapters, read them here and here.

    Arches National Park is located just outside Moab, UT. It has become a ‘timed entry permit required’ park. Like so many national parks, it became overrun and extremely busy and they implemented timed-entry. I will say it made it for an extremely pleasant visit.

    We had 7AM permits and drove in about 7:50am. (You have an hour to enter with your permit – if your permit is 2PM, you will have from 2-2:59PM to enter the park.) We were able to enter quickly, stop at the visitor center and fill up with water and use bathrooms.

    We then headed into the park and stopped at:

    Windows Arch

    We headed into the first stop having by-passed a couple of turnoffs. The Windows Arch is actually several arches all in a small area and you can do about a mile walk if you want to do it. (North Window, South Window and Turret Arch.)

    North Window Arch

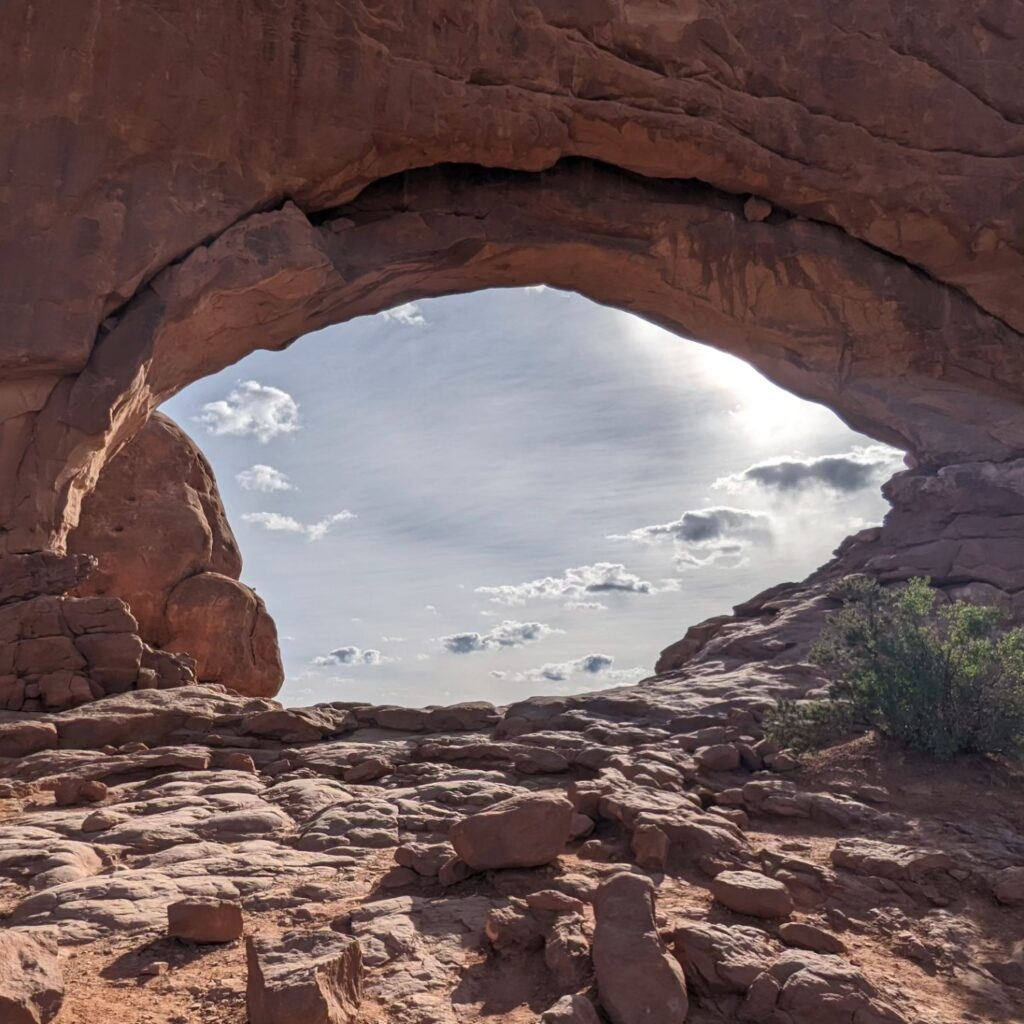
    Some of our friends saw a snake, so there are definitely rattlesnakes in the area, but I (thankfully) didn’t see or hear any!

    We walked around the corner to see South Window Arch and then over to Turret Arch. All of these are within the same parking lot. Enjoy the beauty!

    Double Arch

    Across the parking lot, down a short trail past the toilets, is another short trail to see Double Arch.

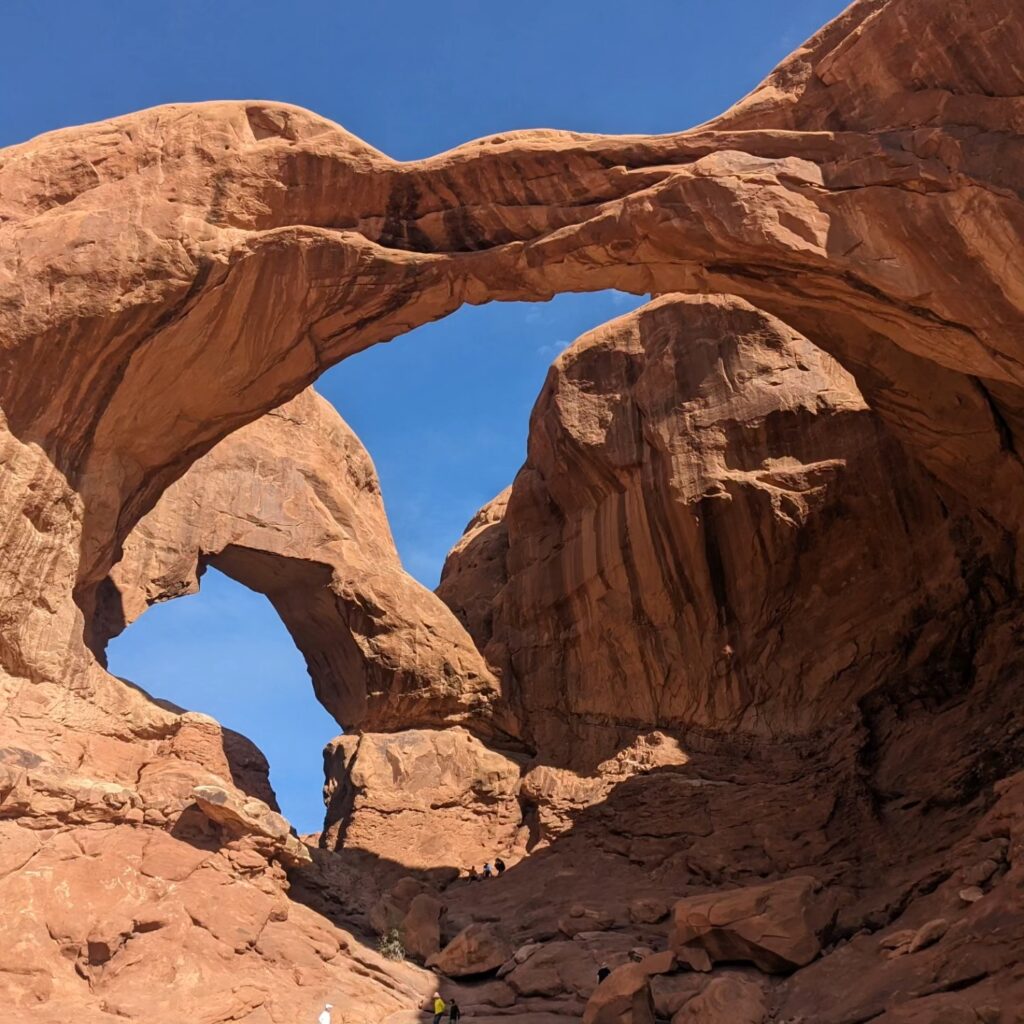
    We climbed up in there and explored around. The rocks look steep but are easy to climb if you have decent traction on your shoes.

    We then drove down the road to Delicate Arch!

    Delicate Arch

    This is a tough 3ish mile hike up to see this arch. There are viewpoints down below that you can drive to, but we didn’t go to those. As tough as it was to get to, it was worth the effort. I struggled because it was day 8 of a hiking trip and my stamina was waning by that point.

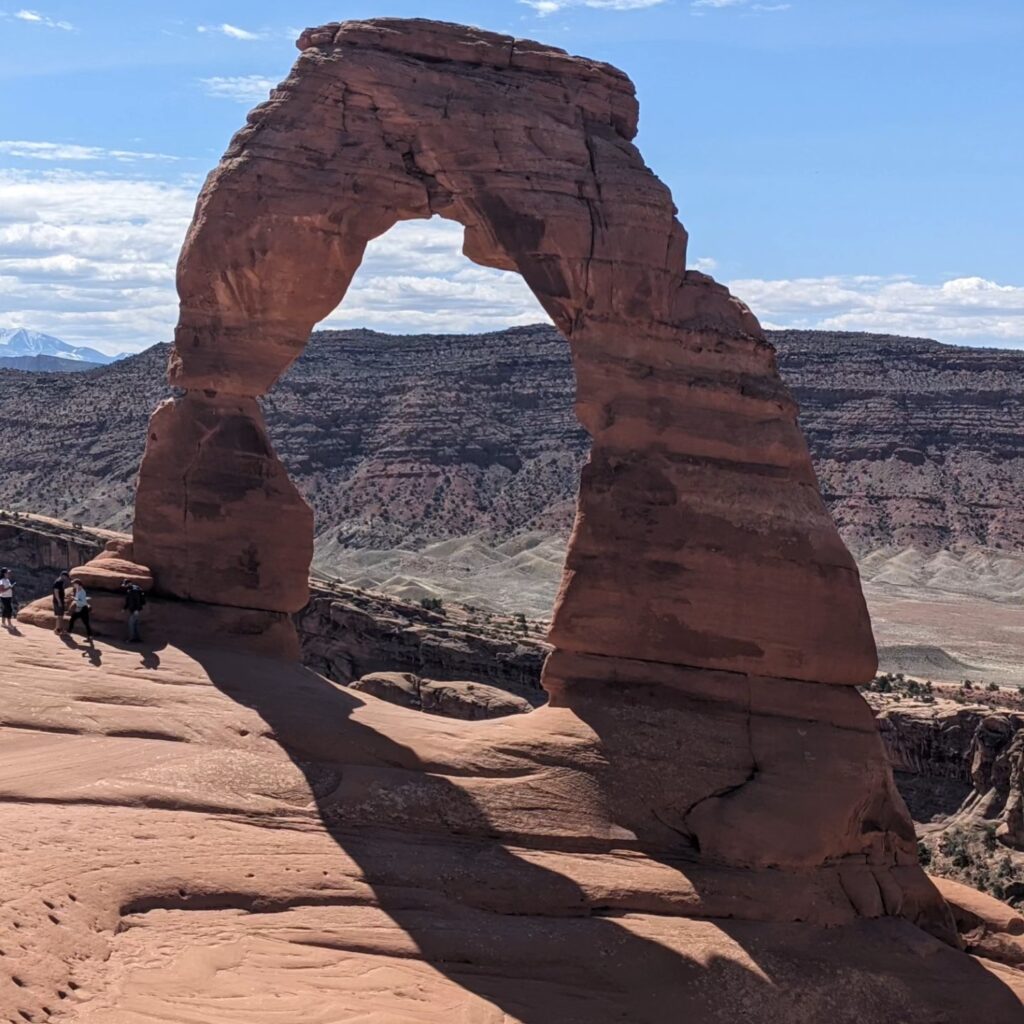
    You may recognize this arch if you’ve ever seen a UT license plate. This is the arch featured for the state. It’s pretty iconic!!

    Most of the trail up was on slickrock (which isn’t slick when dry!!) and easy to walk around. If you’re afraid of heights, this may be a decent test of your resolve.

    This trail is very exposed, so make sure you have water with you and are wearing proper sun gear.

    Final stop on this day was at the end of the road. The group went out to Landscape Arch, but I stayed in the car and snoozed. I was exhausted by this point. Mr. LSH & I plan to go back to this area in the future, so I know I’ll get to see Landscape Arch another time.

    Fiery Furnace

    The next day, we went back to the Fiery Furnace. Permits are required. Permits are available at 8AM MT the week prior to going. If you intend to go on Wednesday, then log into the recreation.gov site early the Wednesday prior to get permits.

    We picked up the permits the day before at the visitor center and watched the required video. We spoke with the ranger before heading who had some really great information. They allow 75 people total per day which makes it a wonderful experience to be able to explore without constantly running into masses of people.

    View coming out of the Fiery Furnace

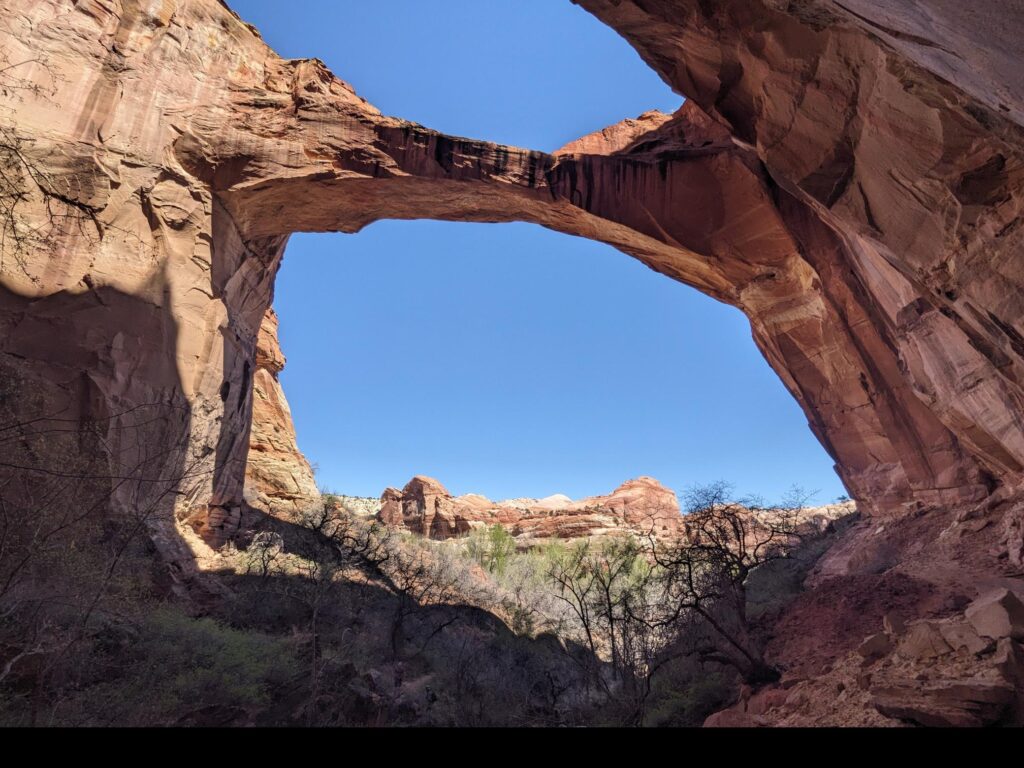
    The Fiery Furnace is a rock playground. You’re allowed to explore anywhere in this area as long as you stay in a sandy wash or on rock. There are delicate areas that you aren’t allowed to step, but there is plenty of ways around these areas to explore.

    Again, the slickrock is easy to walk around and maneuver on with decent traction on your shoes.

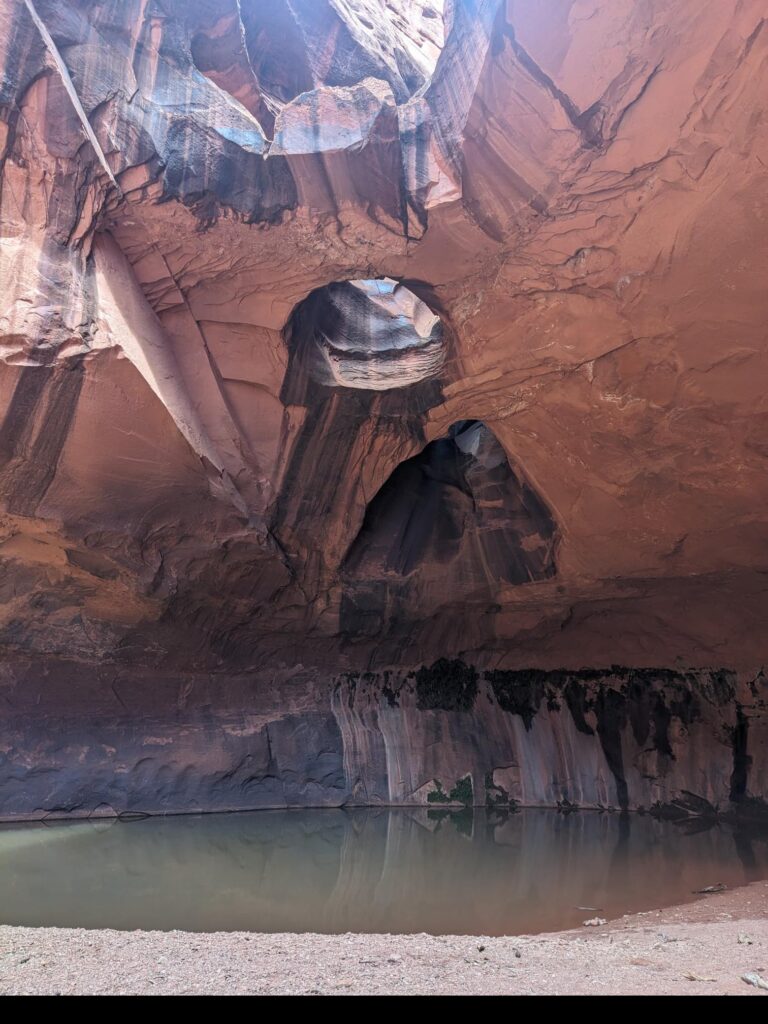
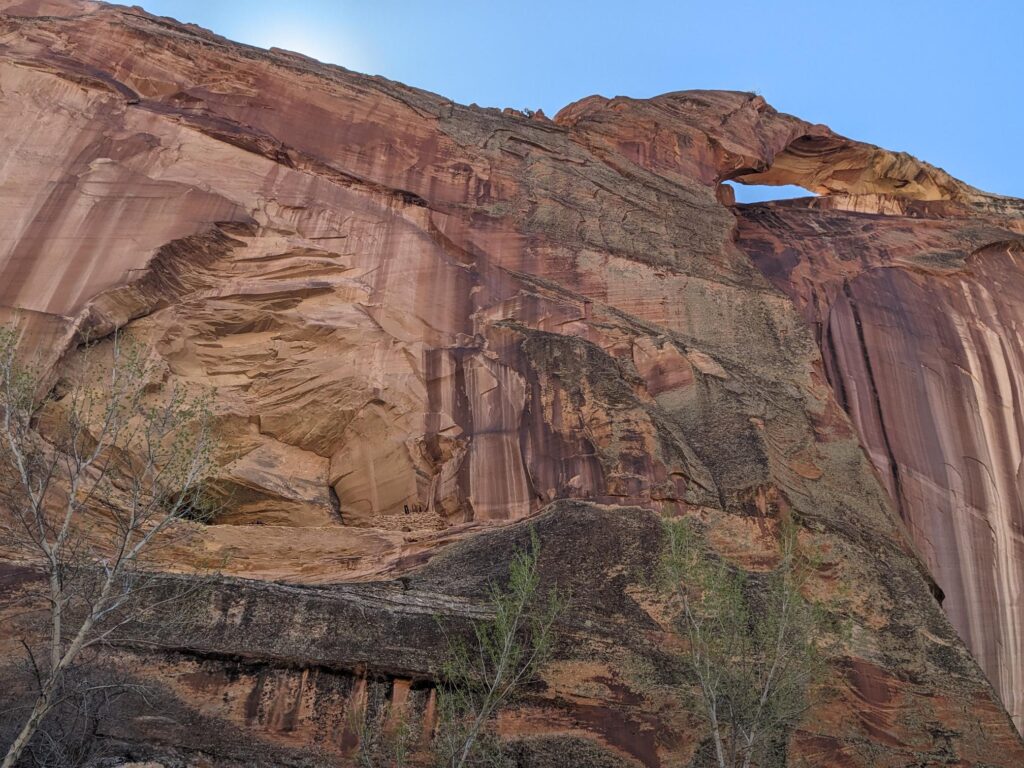
    The park has small signs with arrows posted pointing to the loop that help to keep you moving in the right direction. There are plenty of side trails (or ‘routes’ as trails are a relative term when you’re on sand or rocks) to explore. We found the Kissing Turtle Arch and Surprise Arch, crawled into a cave, found a huge hole in a rock formation that was similar to the Golden Cathedral and saw plenty of lizards.

    After many days of direct sun, I relished the shade that these rock formations created. In spite of its name, it was cool and shady and comfortable to be able to spend hours exploring.

    Stay tuned for the last installment of this Southern Utah “Away From Home” series which will feature Canyonlands National Park.

  • Away from home: Capital Reef NP

    Growing up, my parents took my younger brother & I on some long road trips to national parks! (Yellowstone and Grand Teton National Parks.) I loved getting to see these places to different from the flat farmland of IL. As an adult living in WA, those amazing terrains in these national parks are amazing to explore even more.

    The next stop in our southern Utah hiking vacation was to Capital Reef National Park near Torrey, UT.

    A national park pass (America the Beautiful pass) is required for these. Unlike other parks, this one didn’t have a station you drive through that checks these passes, but make sure you have it displayed at viewpoints and trailheads. Highway 12 runs through the park which I would assume is why they don’t have a pass check point.

    We arrived in Torrey, UT and stayed at a tiny 1800’s pioneer cabin that had recently been renovated and turned into a vacation rental. It was ‘tiny house living’ for sure, but done VERY well!

    Like most national parks, there is so much to explore, we couldn’t do it all in the time we had. We managed to fit in:

    • Cassidy Arch
    • Rim Overlook
    • Hickman Bridge

    Cassidy Arch

    We started our day with a stop at the Capital Reef Visitor Center and then headed up the Scenic Road to the Grand Wash road. We stopped at the end of the road and hiked up to the Cassidy Arch.

    This isn’t too long of a trail (I think about 3ish miles and less than 1000 ft elevation gain). There is an incredible viewpoint of the arch about halfway that if you wanted to stop for the picture, that would be the spot. (the picture above is taken from there)

    We continued along to the end of the trail which ends just above the arch looking down through it!! We stopped on top for lunch and then as we headed back down, we ventured out over the top of the arch! It’s so wide across the top, you wouldn’t know you’re walking on an arch, if you didn’t already know it.

    We did see someone rappelling down through it and saw a couple of anchor points where people rope in.

    Once we got back down to the Wash, we did walk up the Grand Wash for a bit, we were hot and have walked up washes before, so turned back after about a 1/2 mile or so. You can walk the whole wash back up to the main road.

    Rim Overlook

    Our next day in Capital Reef took us up the Navajo Knobs trail to the Rim Overlook. This day was partially cloudy and we loved the occasional reprieve from the sun when a cloud blew in.

    The views from the overlook are spectacular! You can see for miles! The perspective from above shows even more beauty that you see from below. It was well worth the trip up!

    We ran into two different couples up there that we chatted with a bit. We always enjoy hearing where other people have been and what they recommend!

    Next up, as we headed back down from the Rim Overlook, we veered over to the

    Hickman Bridge

    This bridge is a short walk from the same trailhead as the Rim Overlook. We got to the side trail and headed to the bridge. This is one that you can easily walk around and underneath allowing for a ton of different angles to view it from.

    This must be a very popular trail in the busy times as they have made the end of this trail a loop. (Herding cats….)

    We stopped here and ate the rest of our lunch that we hadn’t finished up at the Overlook. It was beautiful (and a bit shady) to stop and enjoy this gorgeous arch.

    When we got back to the car, we headed back to Torrey and stopped for ice cream at the Color Ridge Creamery in town. We both decided to get a flight of their ice cream. The lavendar honey was to die for!!!

    We loved Capital Reef and plan to include it on future trips to Southern Utah.

    For more from our Southern Utah trip, read here.

  • Away from home: Grand Staircase – Escalante

    *some links in this post contain affiliate links which means I will make a portion of any sales directed thru my links

    Ahh, southern Utah – you are so beautiful!!!

    We recently went on vacation to Southern Utah and visited Grand Staircase-Escalante National Monument, Capital Reef, Arches and Canyonlands national parks.

    I’ll start with the first bit of our trip in the Grand Staircase-Escalante National Monument.

    Upon flying into Salt Lake City International Airport (SLC), we rented a Toyota 4Runner and drove to our VRBO in Boulder, UT.

    The Toyota 4Runner was needed for the high ground clearance. It was comfortable, had 4×4 options if we needed it (used once) and the ground clearance was fantastic.

    We stayed in the upstairs of a barn on a working ranch in Boulder, UT. It was beautiful, quiet and dark (amazing skies at night)! The unit was large, well equipped with a super comfortable bed and bedding. The kitchen was large which made making dinners easy.

    The hiking is beautiful in this area. We will be returning! We hiked

    Golden Cathedral

    The Golden Cathedral trailhead is in the Grand Staircase-Escalante National Monument. About a 1/2 mile down into the canyon, you will see a sign where you cross over into the Glen Canyon National Recreation Area.

    Golden Cathedral is worth the effort to get there!!! Strava clocked this hike at 10.46 miles with 1561 elevation gain. My husband found a map ahead of time that made this hike a loop rather than an out-and-back.

    At the bottom, we crossed the Escalante River to head into the canyon to the Golden Cathedral. We changed out of long pants and jackets (Avery leggings and Ryann hoodie) into shorts (Dani bike shorts) and water shoes. The water was ‘refreshing’ and not too deep at this crossing.

    It’s then an easy walk to the end of the canyon to the Golden Cathedral! What a spectacular site! The overall hike was a typical desert BLM hike in southern Utah, but the destination was worth it!!

    This hike is on BLM (Bureau of Land Management) land, so the trails can be fairly primitive compared to National Parks or what we’re used to in WA. We veered off on cattle paths multiple times and then bushwacked back to the main trail. If you have AllTrails, be sure to download the map.

    Hikes that are backloaded with elevation are not what we are used to being from WA. The hike out got harder once we started to walk out of the river valley. We crossed the river about 5 times and the deepest came to my knees. Back at the trailhead, the wind was still blowing and was a bit chilly, but after the effort up the side of the canyon, it felt fantastic!

    Escalante Natural Bridge and Cliff House Arch

    Day 2 took us to another river valley after we changed our plans to allow for adjusting to elevation, dry desert air and sun. We decided for a shorter, flatter hike than the day before and went to see the Escalante Natural Bridge and Cliff House Arch.

    This was a lovely short hike that is fairly flat. We walked through a river valley with multiple water crossings. (Wear or bring along water shoes).

    Upon getting to the Escalante Natural Bridge, make sure you cross the river and climb around in the area underneath and behind the bridge. It is spectacular and a great place to stop and grab a snack while you’re taking in the beauty.

    Head down the trail another ~1/4 mile to the Cliff House Arch. You’ll easily see the ‘cave’ in the rock and then you’ll see the arch. But make sure you look into the ‘cave’ to see the Cliff House!! (Zoom into the middle of the picture above to see it.) Incredible to see the structure still in place and it makes you wonder how anyone got up there to build it and use it. Ladders rule!

    Being the spring, watch out for poison ivy! Unfortunately, I found some. I didn’t even think to watch out for it thinking it wasn’t something in the area, but it is, so keep an eye out to be able to avoid it!

    Devil’s Garden

    After we hiked to the bridge and arch, we headed into the town of Escalante for some lunch, groceries, gas and a mocha!

    Once all of the above was accomplished, we headed back out the Hole in the Wall road for a quick, short walk around Devil’s Garden.

    This was a great, short little wander around some rock formations and hoodoos. The trailhead has a pit toilet which is pretty rare on BLM land (from what we saw). There are a couple of picnic spots too with picnic tables and grills.

    AllTrails said this was about a 1-mile loop, but it is really more of a rock playground that you can wander and climb around in. This is a great fill-in hike when you aren’t quite done for the day, but don’t have all that much more in you for a longer hike. (My feet were done after wearing water sandals that allowed too much debris in, so they were overly exfoliated from all the sand)

    Lower Calf Creek Falls

    On our third day, we got a late morning start to Lower Calf Creek Falls. This hike is pretty exposed as far as sun with little shade until you get to the falls, so be prepared with sun cover and sunscreen and plenty of water (I use this water bladder in my backpack).

    The Lower Calf Creek Falls hike begins in the campground. Grab a brochure at the start to get more information at the number posts along this hike.

    This runs along the Calf Creek and has areas with water that spread over the valley where beavers have dammed it up. There are petroglyphs across the valley (zoom in on the shadow on the wall where it curves down in the picture below)

    The falls were beautiful with a cool pool underneath. It is a great spot to plan to stay for a bit and have lunch or a snack.

    This was a fairly easy hike with some rolling spots as you navigate up and around the creek.

    When we walked out of this hike, we headed up the hill on Highway 12 to Kiva Koffeehouse! I highly recommend grabbing a drink and snack up there. The views of the valley below are breathtaking.

    Stay tuned for the next stop on our Southern Utah vacation!