November has started in the PNW in the typical dark and rainy fashion. But that just means, indoor projects and hobbies!
I have continued to work on getting the free fruit processed. The Liberty apples are applesauce, canned and stored on a shelf in the garage.
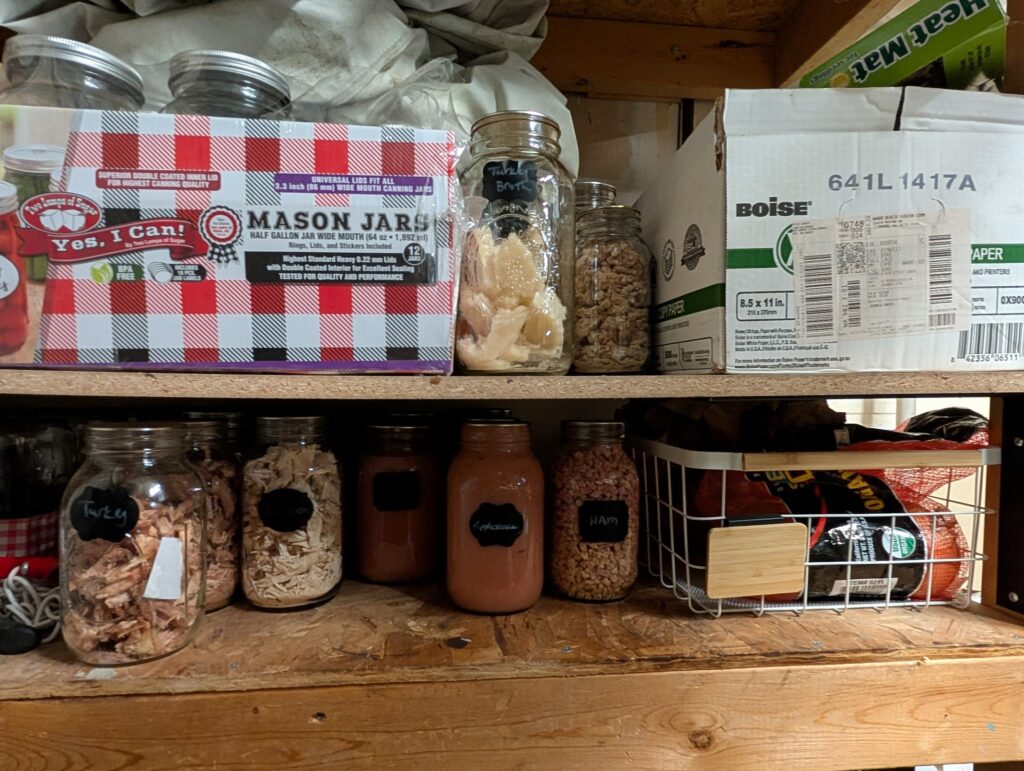
Garage shelf with applesauce as well as freeze dried meats and broth. And cool storage for onions & potatoes
The cider apples are pending processing. Once I finished that box, I’m done with this batch of fruit. These will get sliced and either freeze-dried or frozen.
The pears were diced and freeze-dried. And also turned into vanilla pear butter. I have it in the fridge and need to water bath can it so it will store well.
The hubby & I cleared out the den closet and rearranged and added a couple of new shelves. It’s not finished yet, but so far it has drastically helped the storage ability of that closet! I look forward to filling it with more goodies.
New shelves in den closet with a lot more room to expand! I have it sorted by fruits, vegetables and ready-to-eat meals. Broths are in the kitchen cupboards and in the garage. And meats are in the garage.
One great thing about cleaning out that closet was getting all of the freeze-dried food organized. We have quite a bit of fruit and vegetables.
I was able to see how many pre-made meals we have available. I’ll need to work on getting more ready for next summer’s backpacking adventures!
If you’ve ever thought about getting a freeze-dryer yourself, Harvest Right is running their Black Friday sale *during the month of November. Check it out! All freezer-dryers are discounted this month!
old-style Small Harvest Right freeze-dryer.
One project I’ll be working on after finding some old seat covers from the RV is to repurpose those to make a cover for the freeze-dryer. Since I have it in the garage, we always have to remember to throw a tarp or a towel over it when my husband is doing anything in the garage that will make a lot of dust.
The jam shelf is also filling up this fall. We don’t eat a ton of jam so I’m finding that if I make small batches every other year, that gives us plenty.
Apple butter, quince jam, ‘raspbarb’ (raspberry/rhubarb) jam and tayberry jam
One thing I plan on doing each spring is to turn any leftover frozen berries into jam. Once the berries start coming in, I need room in the freezer for the fresh ones so will clear out the previous seasons.
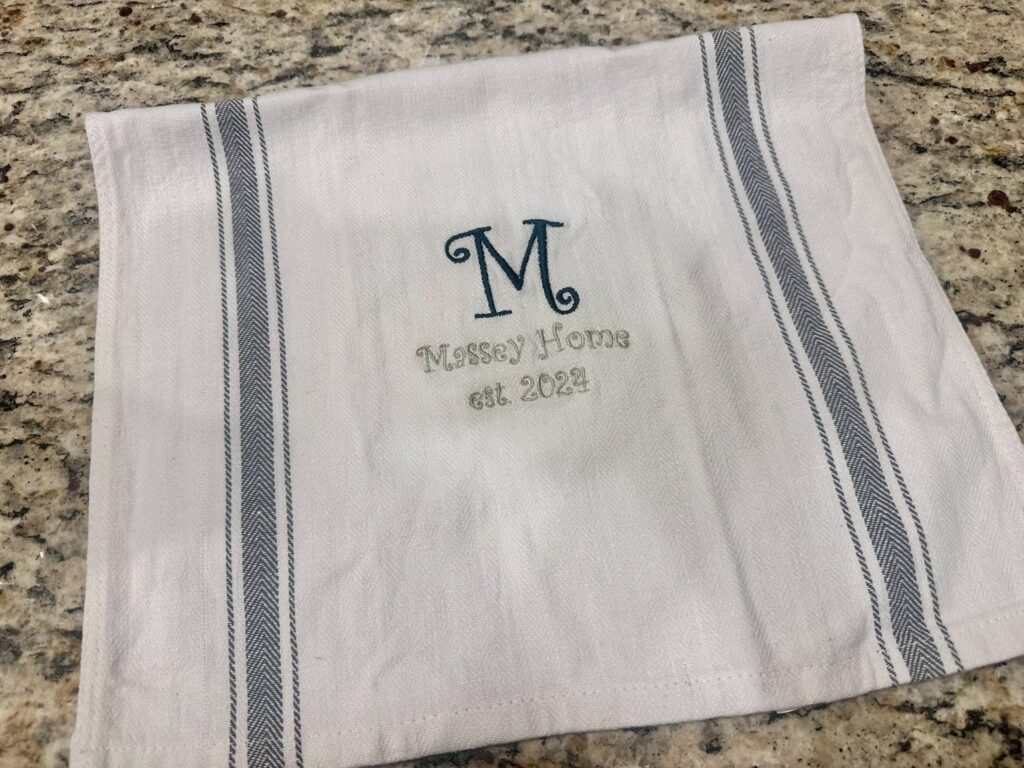
And the final piece of news from the last few weeks, I have started listing my embroidered tea towels in an Etsy shop. (https://spfled1016.etsy.com) Go check it out.
These are customizable and I can make them in a day or less. They make wonderful gifts (holidays, showers, weddings, house warmings, etc.)
I hope your autumn is going well and you’re looking forward to Thanksgiving! I’m grateful that you’re reading my blog! Thanks!!
(*this is an affiliate link which means I’ll make a % of any sales that result from you clicking through my link)
Fall has arrived and so has the harvest to be put up!
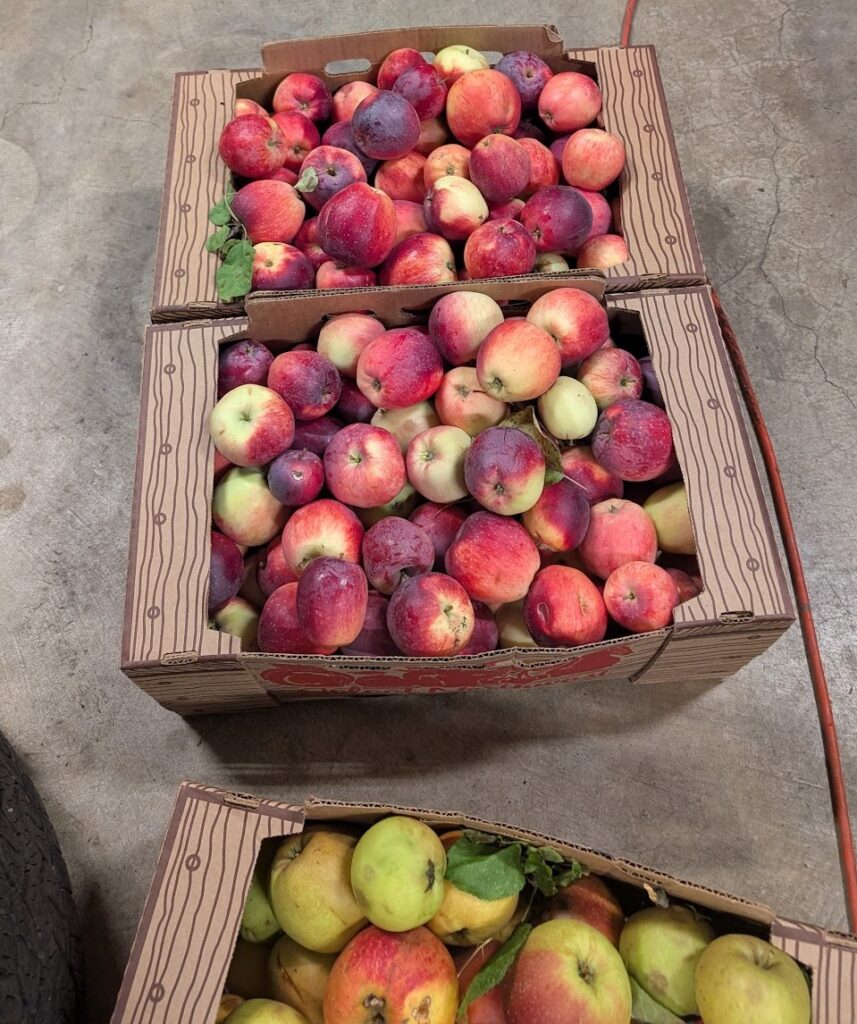
I posted in a local FB group that if anyone had fruit trees that needed picking, I was available. I got two offers to get fruit FOR FREE!!!
One lady had apple trees and I came home with 4 boxes! I overestimated my energy level to process all of those apples. (It didn’t help that by the time the weekend was over, I had a pretty nasty cold for a couple of days.) I gave one of the boxes to a family at my church.
With the apples, I have made a double batch of apple butter, 4 quarts of applesauce (so far) and freeze-dried 2 trays (so far) of apple slices.
I have another batch of applesauce started and will finish the box of the red (Liberty) apples making those into sauce. When I cook them down, I run them through an old-fashioned sieve and end up with a lovely pink sauce because of the red skin. My husband has been enjoying eating what’s leftover in the sieve.
My applesauce is literally just cooked down apples. I don’t add anything to it. I prefer unsweetened and these apples are so sweet, I definitely don’t need to add anything to them.
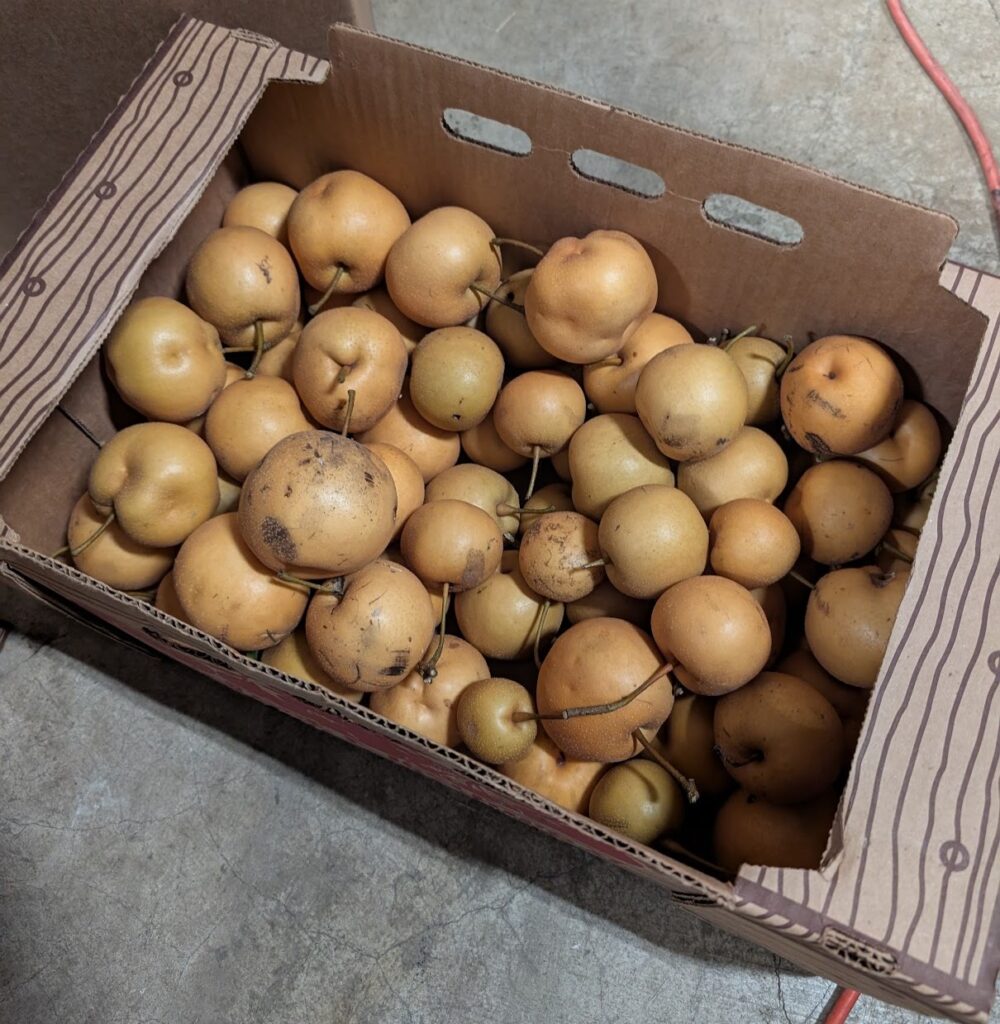
Another lady had an Asian pear tree that was ripe. Unfortunately, that one ended up being too tall to get much, but I did come home with 3/4 of a box of pears.
When I got home that afternoon, I made some ginger pear muffins from the Trim Healthy Mama membership site. They’re delicious!
I plan on making a batch of pear jam and then freeze-drying the rest of them. I like pears as snacks when we’re hiking but then can easily rehydrate them for baking.
We also harvested the quince from the quince tree. My husband planted the tree as a novelty in the backyard last year and there was 1 quince. This year, we picked 13 for just under 9 lbs. of fruit.
I’ve had to look up quite a bit on quince to know what to do with them. These are Portugal Quince, and they look like a large pear. They can be eaten raw but are quite hard and very tart. But when they are cooked, they sweeten up and have an almost tropical scent.
Unfortunately, when I cut the first one open (and each one so far since) they’re brown on the inside. I have a message to the nursery we bought it from to see what they think.
UPDATE: I heard back from the nursery and they confirmed they were overripe. Next year, we’ll pick them as soon as we can smell them while on the tree.
But, we did bake the first one and my husband ate it. I don’t think it had been cooked quite long enough as it was still pretty hard. And today, I’m cooking down 3 of them to try quince jam.
The best way I can describe what quince tastes like is a peach/pineapple cross. It’s good, just unusual. I believe I cooked down enough for 1 jar of jam. We’ll see what happens!
UPDATE: The finished jam has a delightful flavor that I think is a peach/pineapple mix, my future SIL said he thought it tasted like pear. My husband and stepdaughter both said mango. So, pick your fruit flavor, but it’s a really bright flavor for a fall fruit. I like it!
The weekend will tell how much of this processing gets finished. Happy Fall!
With Joann Fabrics closing permanently, I have made a few too many stops in there to look for deals on fabric. While visiting my parents in WI, mom & I went into the Joann store. The day we went they had a sale for when you bought the rest of what was on a bolt, you got an additional 50% off the price (which was already 70-80% off).
I’ve had my eye on this fabric every time I’ve seen it, but because it is canvas, it is too thick for quilting. But I love the pattern. I took a picture, sent it to my husband to make sure he didn’t hate it, and then bought the rest of a bolt. It was 8.5 yards. (Turns out, I probably needed at least another half yard)
I decided this would be really pretty to recover the cushions for the patio chairs. There is nothing wrong with existing cushions, except that the fabric is faded.
Once I got home, I took one of the cushions apart to use as a pattern. I knew I needed cording for these, but as I took them apart, the existing cording is plastic that I can reuse.
Once I cut out all the pieces, I put the various pieces together and started sewing. Having so many components to sew together took a bit to get in the groove, but I got there. I have learned some lessons on the first one to make sure the remaining three turn out better.
My husband’s first reaction to seeing the finished cushion was “wow! That has a lot of color in it!” LOL, yes it does. Then, this morning, he sat outside to drink his coffee and said he really liked it and I did a great job. <3
I really like how it turned out and am looking forward to getting the remaining three cushions finished. It is so much brighter, fresher and cleaner. Maybe we’ll actually end up sitting out at the patio table now.
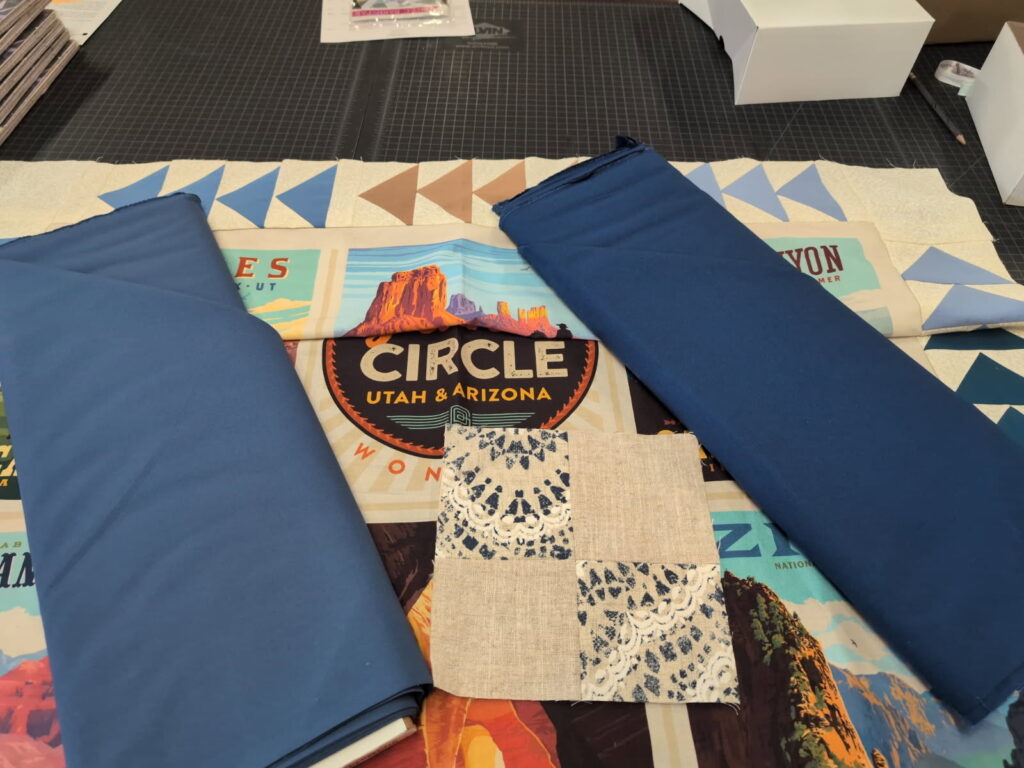
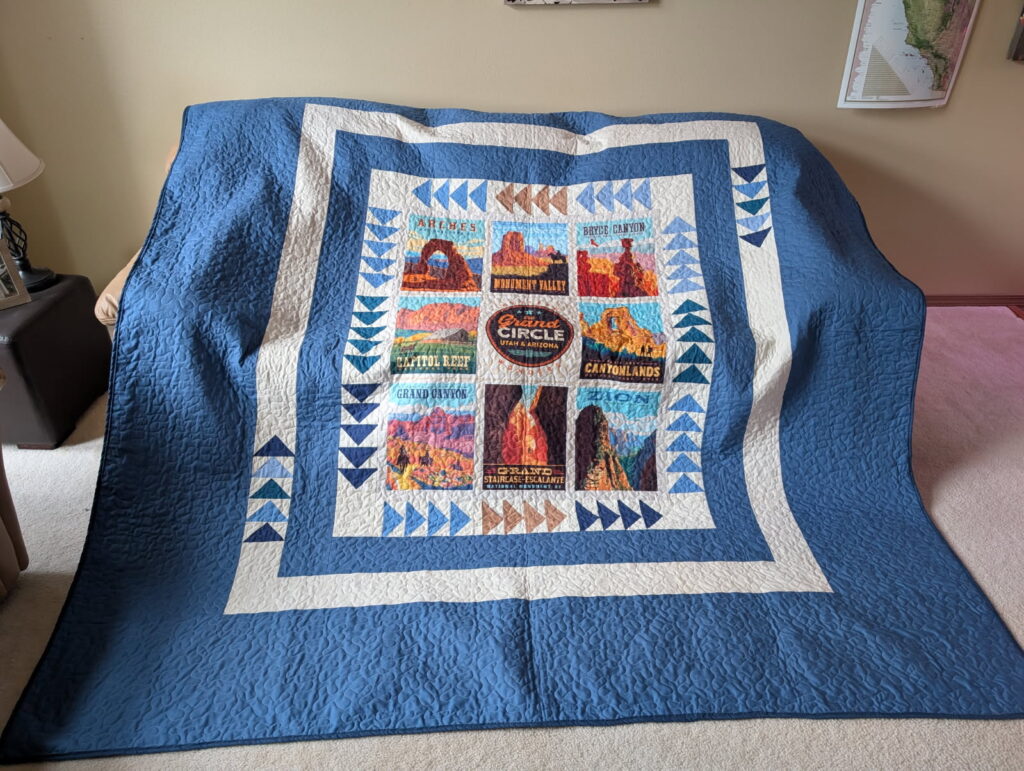
With my new sewing machine, my husband suggested that I make a quilt for the bed in our travel trailer. I suggested that I get a National Parks panel. There is a fabric designer, Riley Blake that had an entire National Parks themed fabric line.
He liked that idea but insisted we had to have Canyonlands National Park as part of the quilt. That specific park isn’t one that was made as its own panel, but I was able to find it as part of “The Grand Circle”.
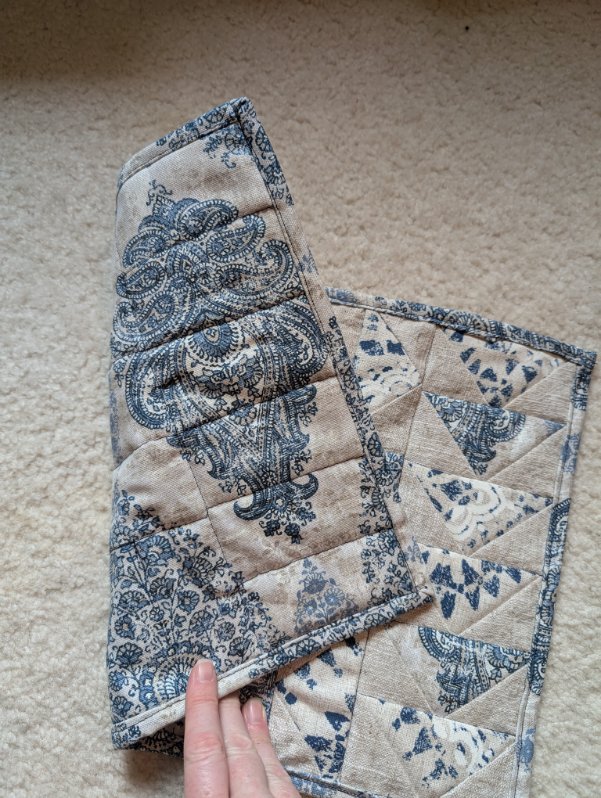
I purchased the panel from a seller on Etsy and then got to work figuring out the colors and design to use. Flying geese was the winning quilting design. I found solid fabrics that matched the panels they would be next to. As I made the flying geese, there were extras left over that were used as a 2nd border. Hooray, no waste (or at least less waste)!
Flying geeseUsing up extra flying geese with a 2nd border
I had fun choosing which border color fabric to use. I took the quilt top that I had done to that point and other fabric that I had used in the trailer redo a couple years ago to the quilt store and laid it out to see what colors would work best.
As it goes with quilting, there were a few things that came up a bit short (sometimes my math was a little off) so I added a bit more fabric to it to make it work.
Oops, needed more fabricChoosing which color to use for borders
There was an issue along the way. For some reason, the navy blue fabric melted when ironed even though it had been ironed at least 5 times previously. That fabric was reusing an old pillowcase, so I think the fiber content wasn’t as much cotton as I thought. Oops!! Thankfully, the iron was easily cleaned up.
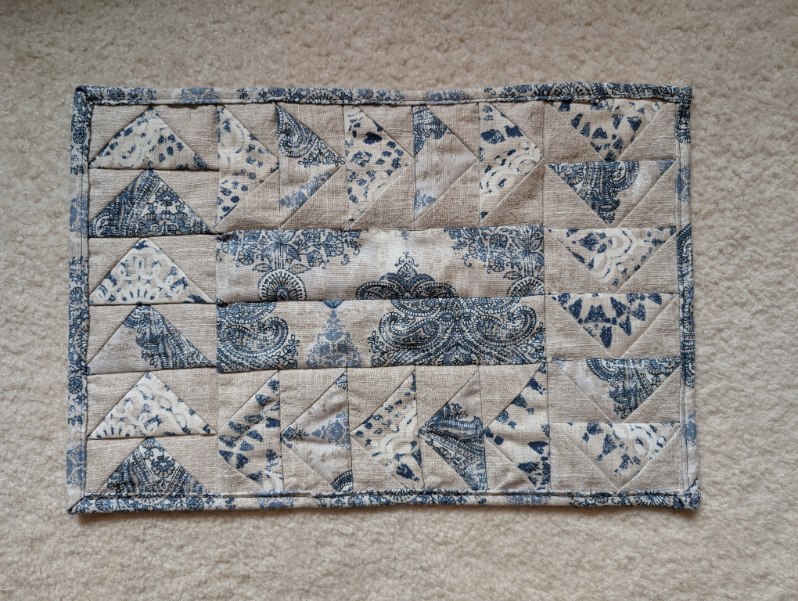
It was really fun to see the quilt develop as more borders were sewn on. I knew what I wanted it to look like but actually seeing it in the end was even better (and a LOT bigger) than I had imagined.
Finished quilt top
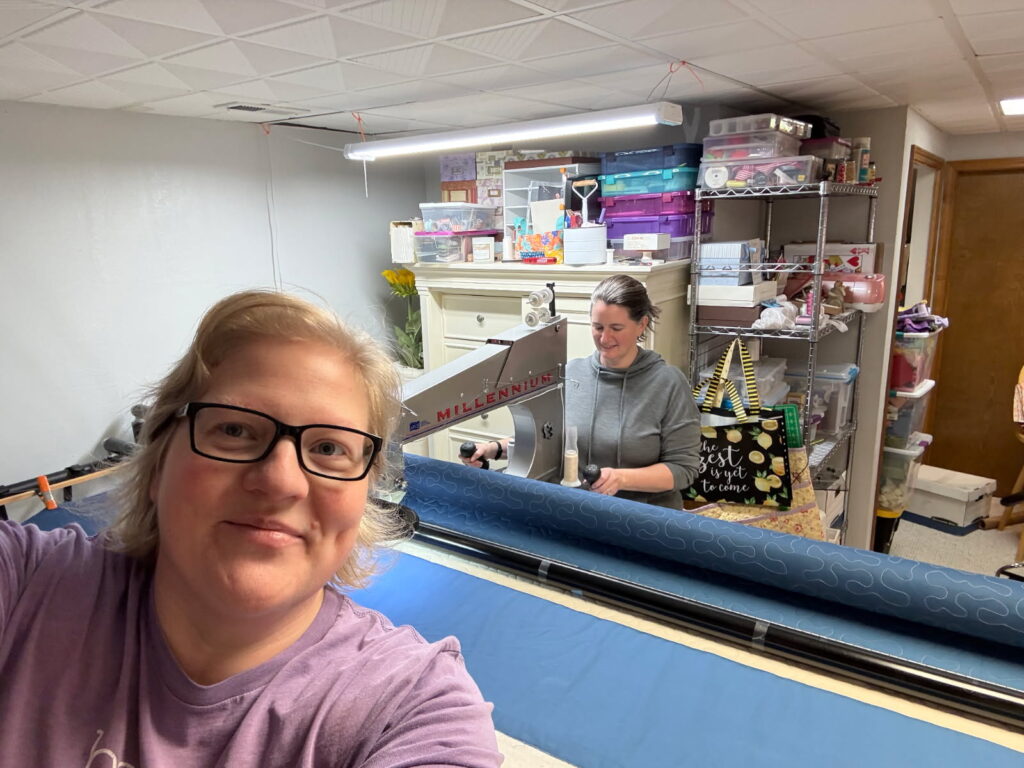
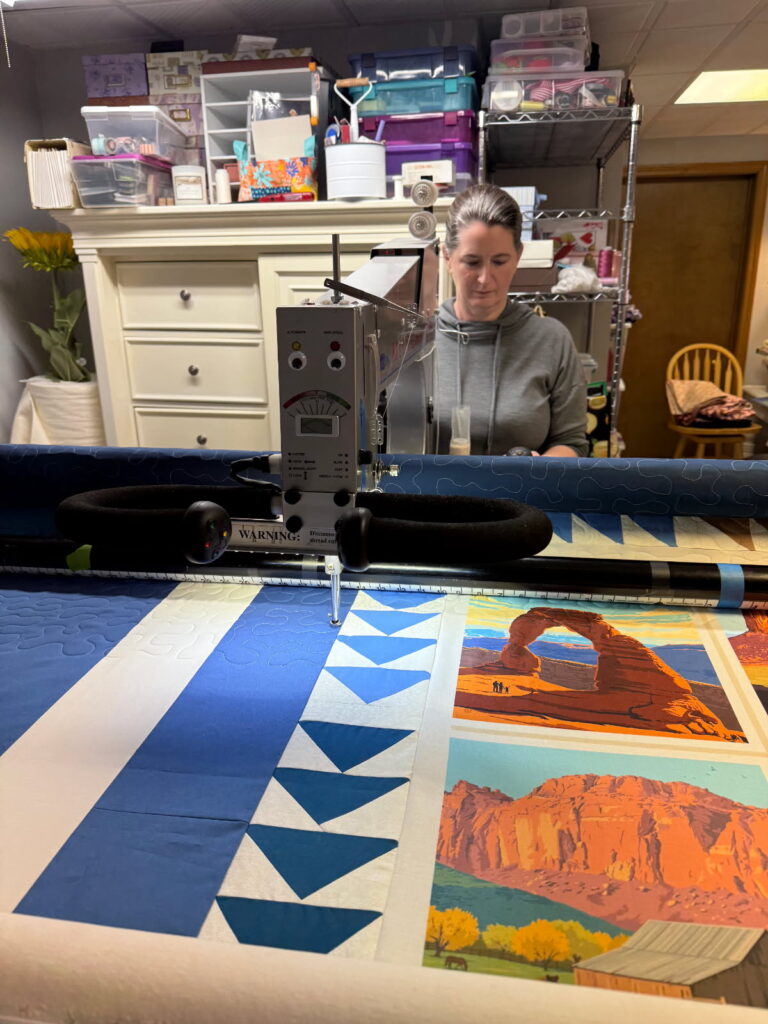
To finish the quilt, I was able to visit a friend who has a long-arm quilting machine. It was so nice of her to let me invade her and her family for a couple of days, and it was so much fun to get to spend time with her! (Thank you Emily!!!!)
She showed me how to get the quilt attached to the machine and then how to run the machine over the quilt to get all the stitches in. I asked if I could do it, and I ended up doing the majority of the stitching on the quilt. It’s a learning curve, but so fun once you get in the groove.
Emily & IQuilting awayFinished quilting
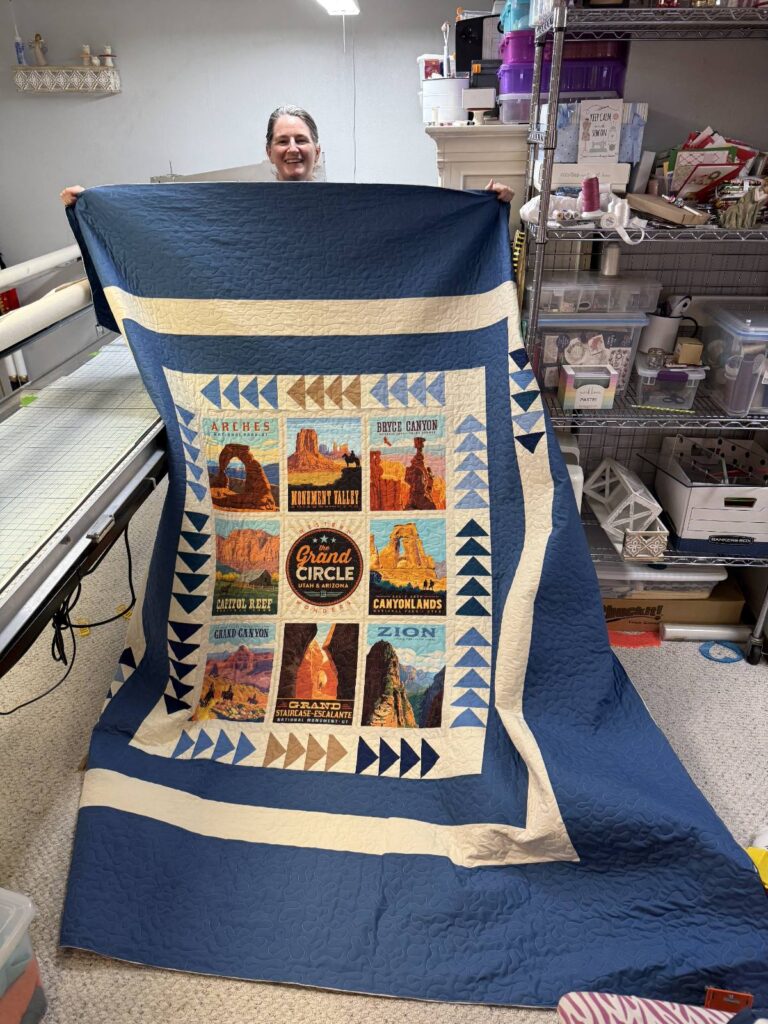
We got it finished up in 1 day. I headed home the next morning and then was able to finish the binding once I got home.
Completed quilt
I really love how it turned out. It’s a little bit too big for the RV bed, but that’s okay, that just means there’s more to wrap up in on cold nights.
I believe this will be the first of many quilts to come!
My hubby got me a new sewing machine as a Christmas present. I got a Bernina 590 which includes the machine embroidery attachment. Wow, is it ever nice!!!
I learned to sew as a kid. Both grandma’s and my mom sewed. There were home economics classes in both jr. high and high school that included sewing.
For quite awhile, I used my grandma’s old (from the 1980’s, not an antique, although are the 80’s now considered old enough??) Singer sewing machine. I was told when I got it that something needed to be fixed, but it was going to cost more to fix than the machine was worth. Based on that, I never expected much from the machine and only used it for very basic sewing.
Being retired, I wanted to be able to do more and better work. I took the machine mastery 101 class where I learned how to properly use the machine, learned all the various features and learned how to service the machine. I had no idea I had to oil the machine EVERY TIME I use it!!!! HOLY COW, no wonder that Singer wasn’t fabulous, I was being very neglectful.
In January was the two-day embroidery mastery class. I immediately came home and did 4 small embroidery projects! (Literally before dinner that night.)
Here are some of the things I have worked on since getting my new machine.
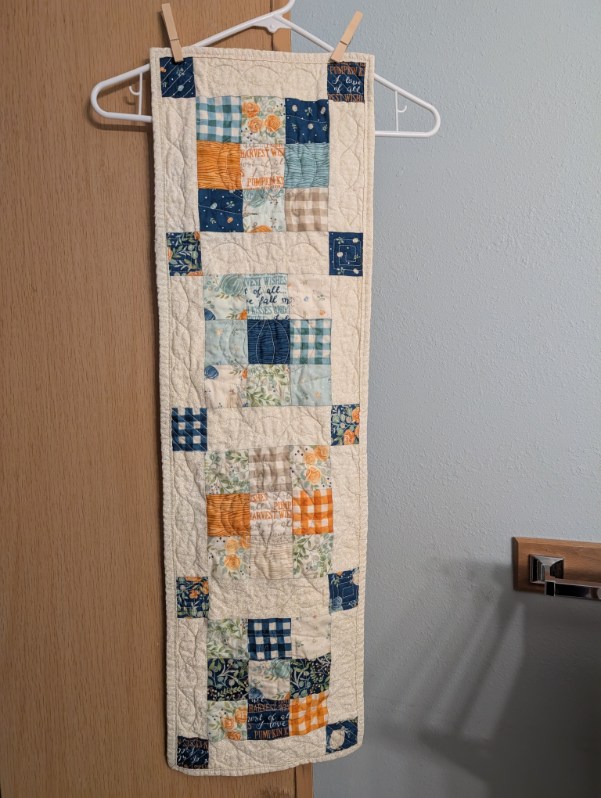
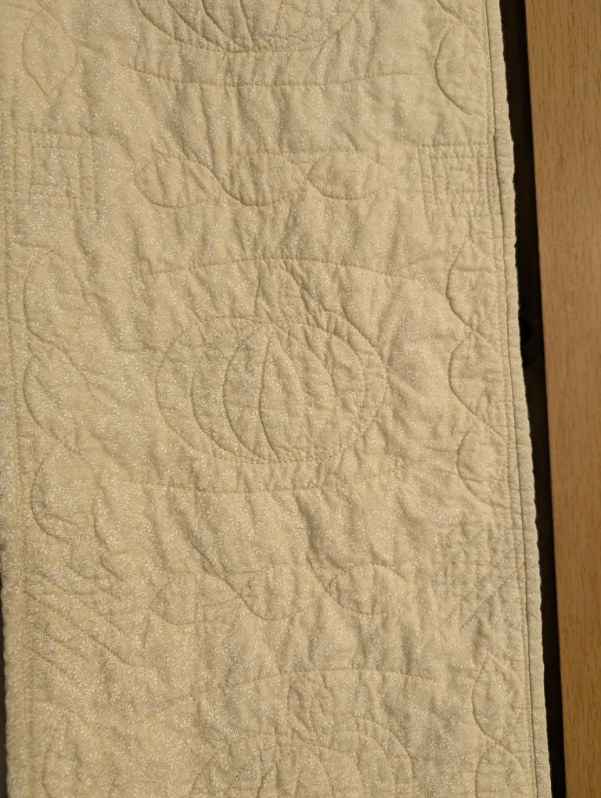
I made a fall table runner. I’m a sucker for anything autumn or pumpkin themed. I machine quilted this one using templates I had at home. For anyone who hasn’t machine quilting, there is a learning curve! This project is at the start of my curve.
With the embroidery machine attachment, I wanted to give that a try and make a few things. There are tea towels for my college roommate’s birthday, my mom and one for our travel trailer.
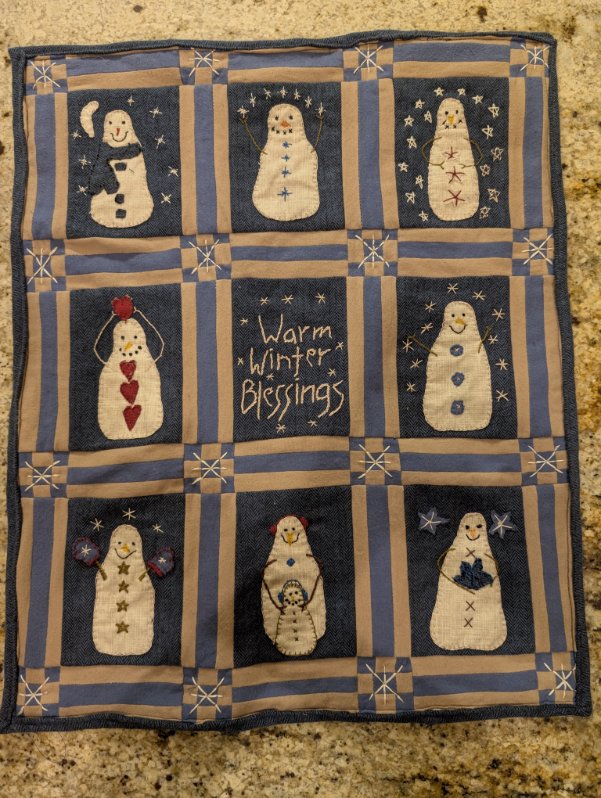
The above snowman quilt was a combination of quilt piecing with hand applique. This is a primitive pattern my mom gave me years ago. She bought everything needed but never got around to making it. She gave it to me and I’ve been intimidated for years to even try it. This winter, I got tired of setting it aside whenever I went through my stash and decided it was time to no longer be intimidated. Mom was VERY patient in waiting for this.
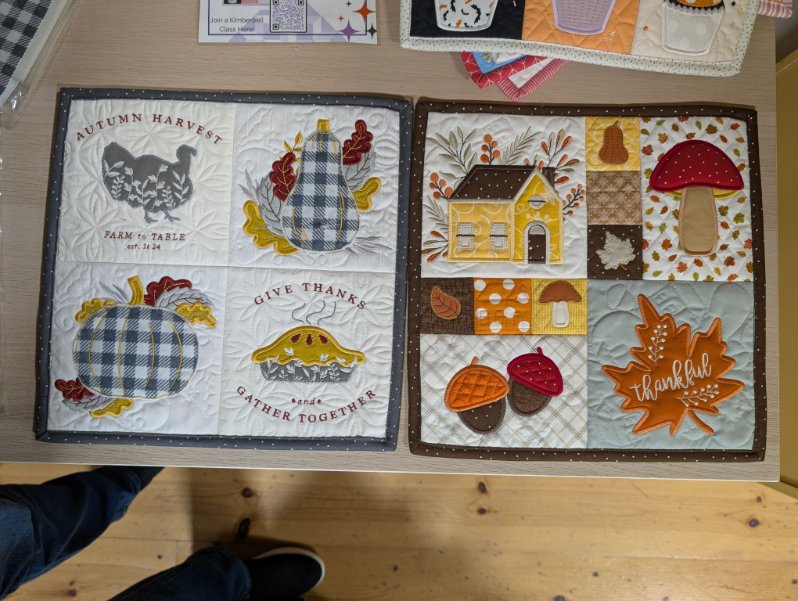
I did NOT make the above stuff, but from the first time I stepped into the quilt shop where my machine was purchased, I saw these little mini quilts and knew I needed to make them. (Again, I’m a sucker for anything autumn or pumpkin themed). Turns out these are part of a 6 month program thru Kimberbell and are the mini quilts for September and November 2024. I ended up buying the patterns and made my own.
They don’t look exactly the same, but I love how they turned out. This was a fun project that combined both quilting and embroidery. I mostly used fabrics I already had in my stash rather than exactly what the project called for.
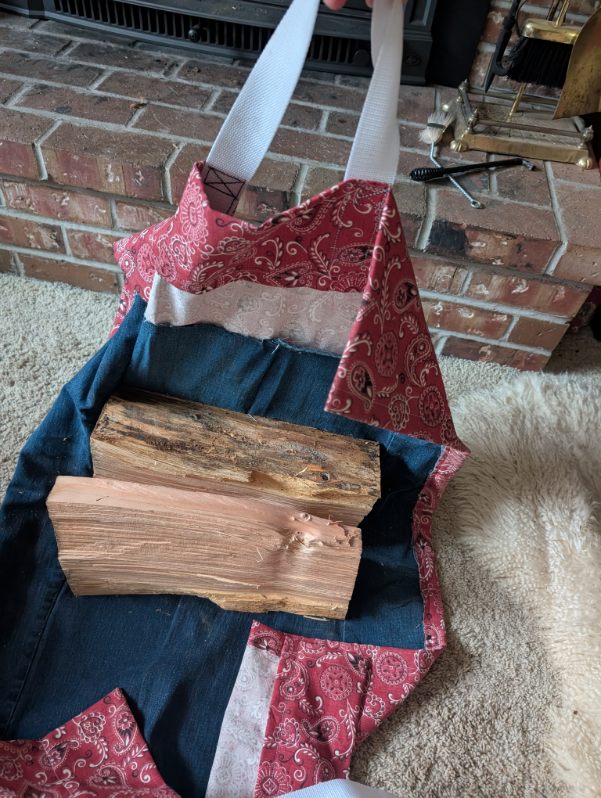
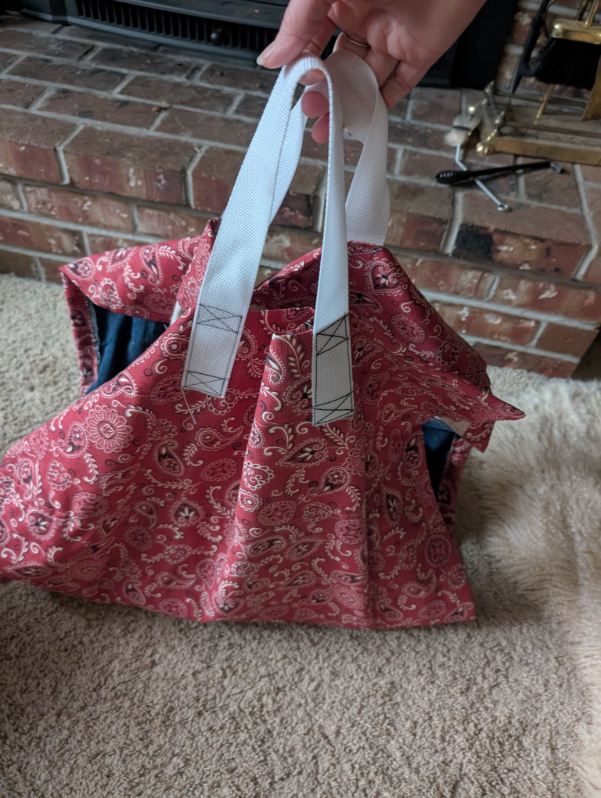
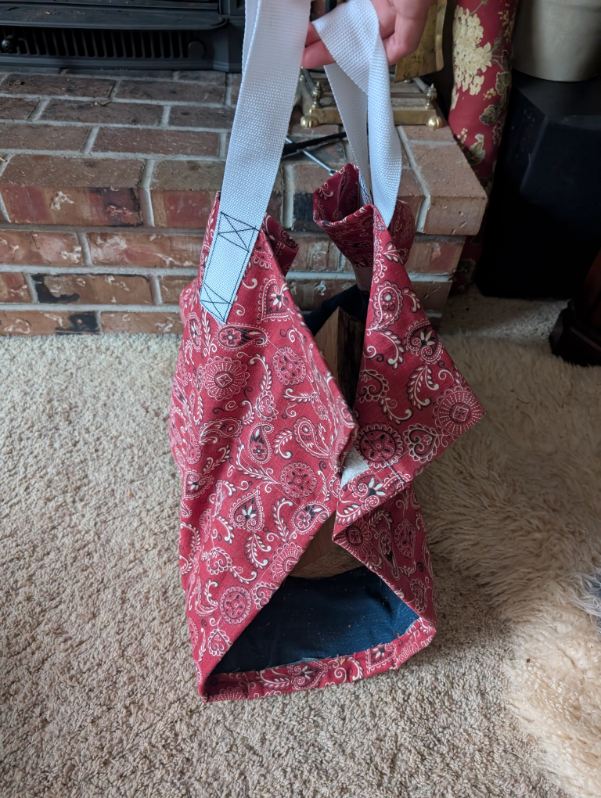
This past year, we had a fireplace insert installed to have a heat source should the power go out. (There have been some silly, dumb reasons (i.e., criminals being ridiculous) in our area that made us decide we needed to be prepared.) After the first few fires of carrying wood in a few pieces at a time, my husband asked me to make him a firewood sling. Without a pattern and using material and old jeans I had on hand, I made him one. I love how it turned out and so does he!
And finally, with Joann Fabric going out of business, I have stopped in a few times and picked up some mini templates which came with 6 patterns included. I decided to make a couple of placemats using a ‘flying geese’ pattern for our travel trailer. I used leftover fabric from the trailer makeover I did a couple years ago.
I’m enjoying my new sewing machine. I have a feeling it will not get quite as much use in warmer month. But, it will definitely get a LOT of use in the coming years!
*Updated 1/9/2025 – scroll to the end for the update
In previous posts, I’ve mentioned that I am looking for ways to avoid the stores (thus saving money). I was at a garden show earlier in 2024 and one of the vendors was selling reusable paper towels. The vendor’s stuff was cute, but she didn’t have the color scheme I was looking for.
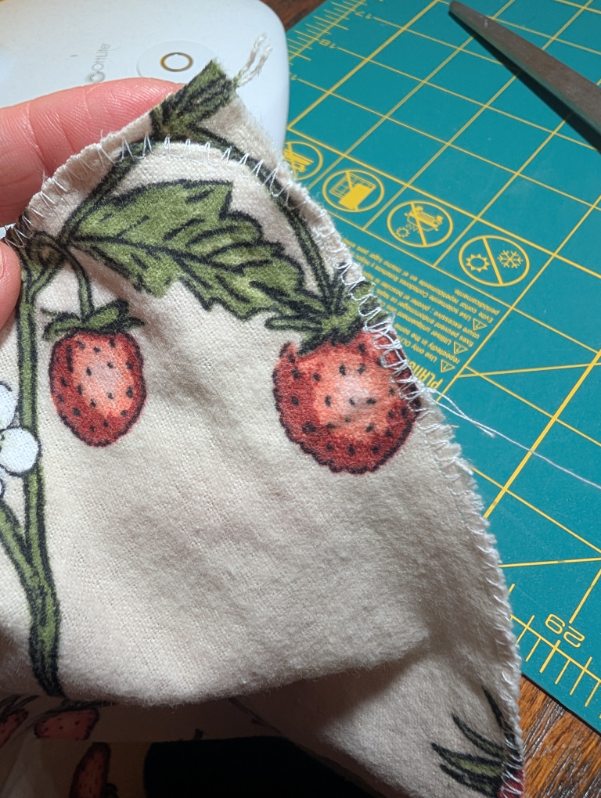
I looked over the product she was selling and thought “this is easy enough that I can make it myself.” It was flannel cut into 10×10 squares and the edges were ‘hemmed’.
I went to the fabric store and purchased a yard each of flannel that was more to the colors/patterns that suited me.
I received a new sewing machine for Christmas and was thrilled that it has the stitching ability to do the ‘hemming’ that I wanted to do. (It’s an overlock stitch)
Like all projects, I procrastinated in getting started, but mostly that was due to waiting for the new sewing machine.
I started by washing the material, so any shrinking was done before cutting and stitching. I then cut the material into 10″ by 10″ squares. (The material was folded so I was cutting more than 1 square at once)
I then starting using the overlock stitch on my machine to finish them up. Sewing squares isn’t all that exciting. LOL
Once I got all four sides done, I snipped any threads, and cut off the rounded corners with a good paid or scissors.
I was careful around the corners to not cut the overlock stitch. I do expect a bit of fraying on those corners when I wash it. But, it’ll do that until the material falls off to the stitch and then it should stop.
To roll them up like paper towels, I rolled one, then overlapped it with the next and kept rolling. It turns out 5 yards of material end up making about 3 rolls of ‘paper towels’. (I have scrap material left, but none that was large enough for paper towel size.)
But they are finished and I love how they turned out!
One less thing to have to buy at the store!
Update: 1/9/2025 – My husband and I took a vacation on the other side of the mountains and the town has an adorable little store that we love to stop in at. Low and behold, they had some reuseable paper towels – 12 for $36.95!!!! :O This was definitely a cost savings.
These are just like I made, but plain. I spent about $25 for 5 yards of material and used a spool of thread I already had at home. I ended up with about 55 ‘paper towels’. Holy cost savings Batman!!!!
*a few of the links in this post are affiliate links. That means if you click and order something, I’ll make a few pennies.
What does a day in my life look like? Most days are pretty similar. Some days I have more energy than others or get more ambitious than on other days.
Rather than lay out a whole day of what I’ve done on a particular day, I’ll instead give a glimpse into random activities I do.
In my ‘homestead wife ness’, I’m still making kombucha and kefir regularly. I have made fermented vegetables. I’ve pickled red onion and radish seed pods. And I’ve made sourdough.
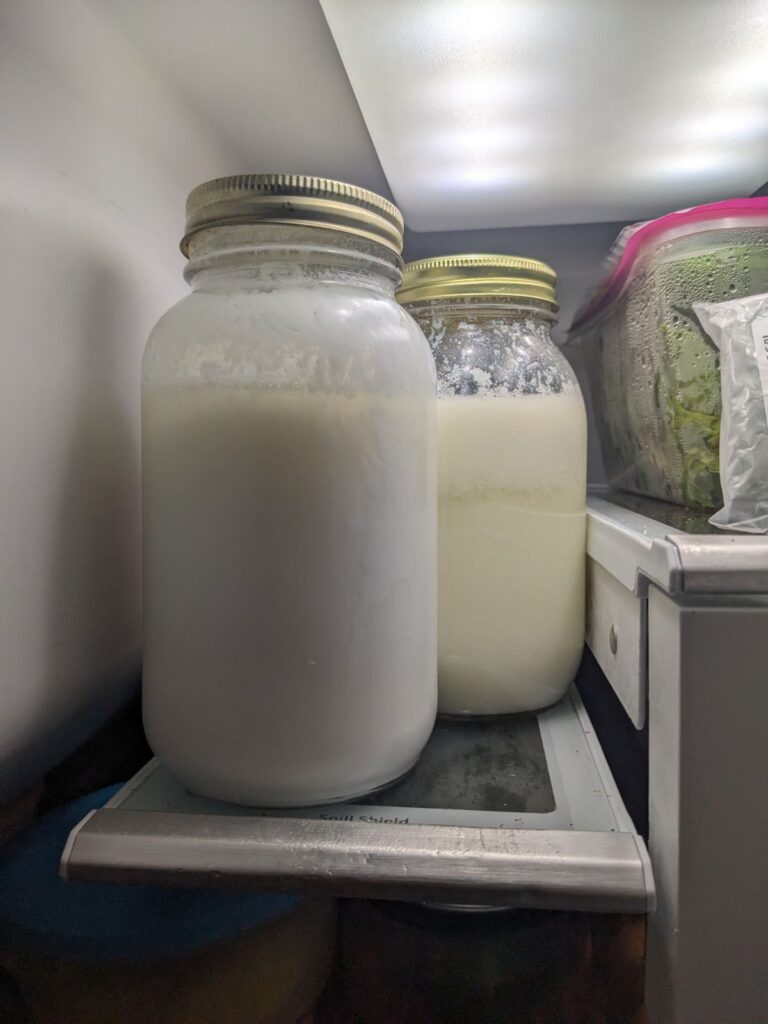
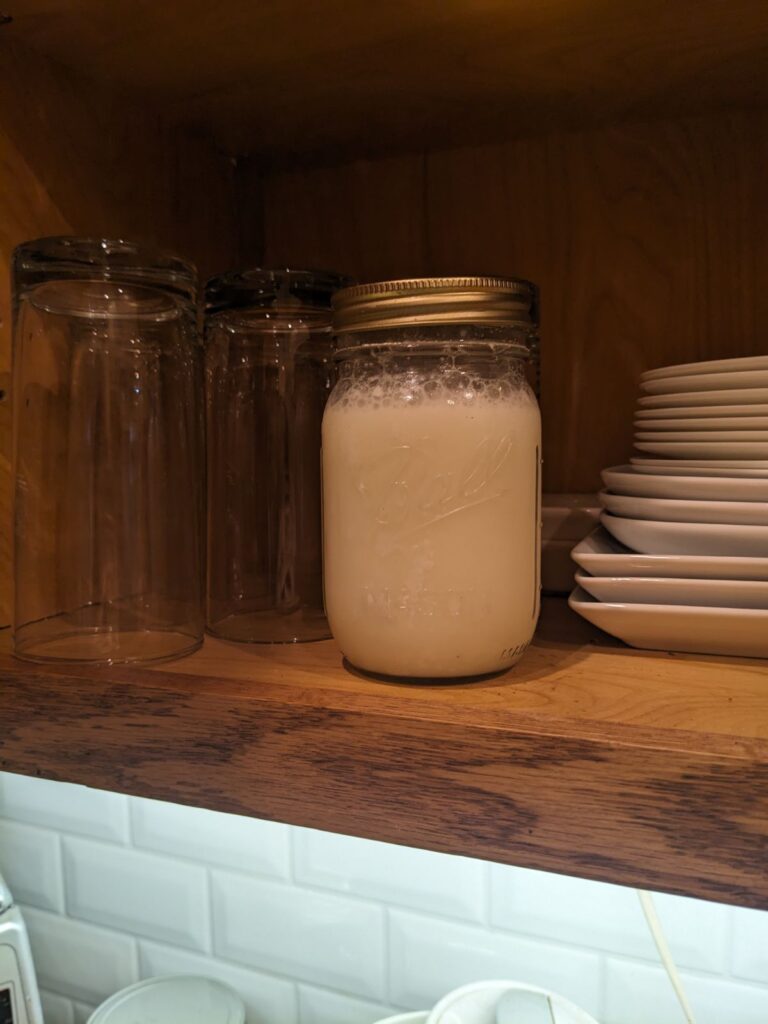
Kefir is a daily or every other day task, but is quite simple.
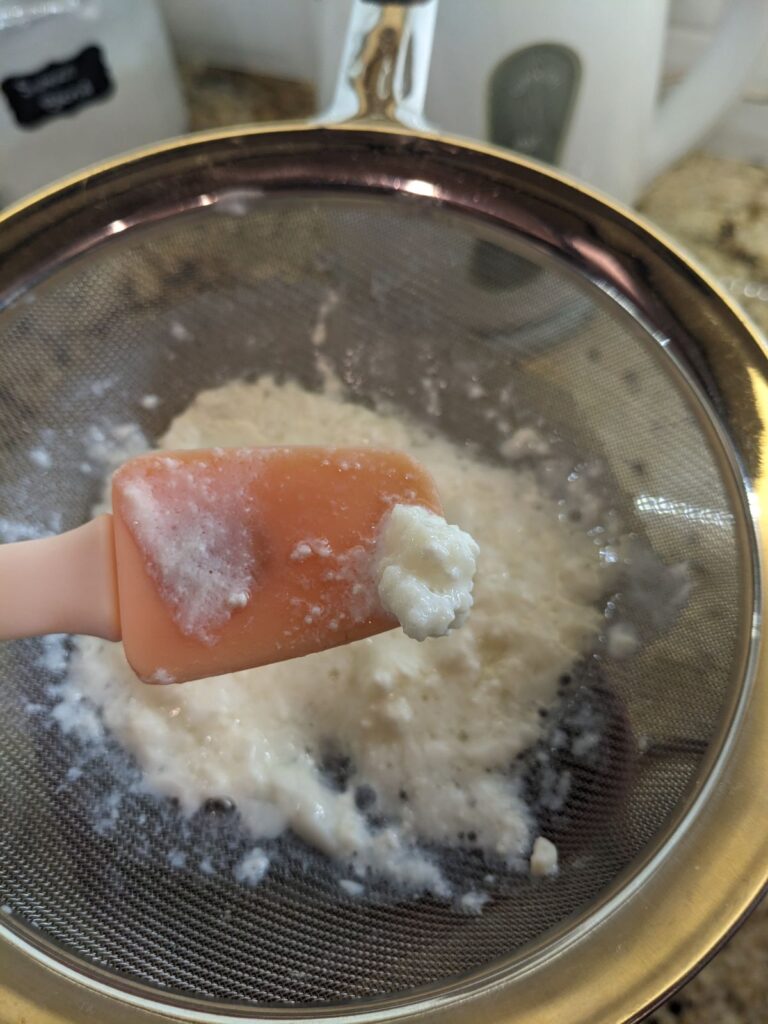
What is kefir you ask? It’s fermented milk. Before you wonder what has gotten into me and why I would drink bad milk, let me tell you! It’s NOT bad milk, its fermented. I have ‘grains’ that I put into milk, let it sit (unrefrigerated) for about 24 hours (sometimes longer if I forget about it) and then I strain the kefir into a new jar and put the ‘grains’ back into the original jar and add more milk to start the process over again. (‘Grains’ look like tapioca beads)
Kefir “Grains”
The grains will ‘eat’ the lactose in the milk leaving behind really good-for-you bacteria that is amazing for your gut! I’ve read that people who can’t do dairy CAN do Kefir because once the bacteria have done their thing, the part that constitutes a ‘dairy product’ has been eaten and it no longer there to cause issues.
It tastes like drinkable yogurt. I like drinking it cold which is why I refrigerate the strained kefir. I add a splash of vanilla and a 1/36th tsp (doonk) of pure stevia powder – drinkable vanilla yogurt.
Looking for a really good, cheap probiotic? KEFIR – find some grains and use store bought (NOT ultra-pasteurized) milk.
Strained kefir chilling in the fridgeMilk & grains fermenting in the cupboard
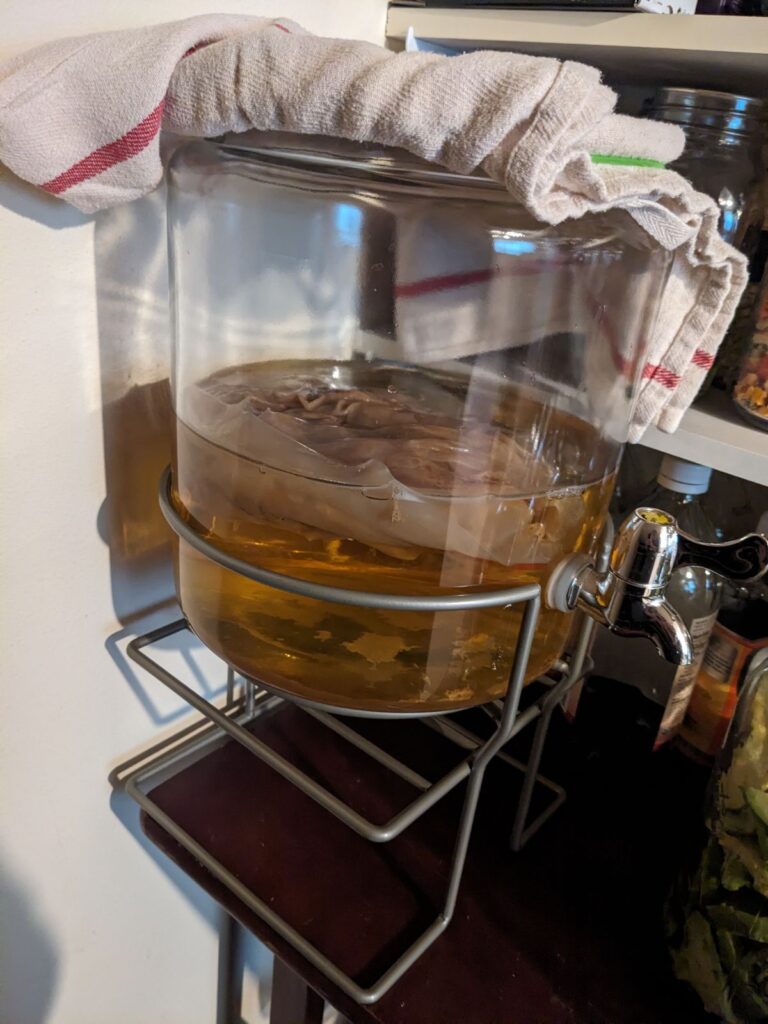
Kombucha is also an ongoing adventure. What is kombucha, you ask? It’s fermented tea! (sensing a theme, maybe?) You can start from scratch, but I’ve always either bought or gotten a SCOBY (Symbiotic Culture of Bacteria & Yeast) to get things started. I brew 2 cups of tea with 1 cup of sugar (basically make a sweet tea), then after it cools to room temp, I add that to the SCOBY and about a cup of tea from the last batch and then add enough water to have a gallon of tea.
Kombucha brewing in the closet (the big slimy thing floating is the SCOBY – it’s eating the sugar)
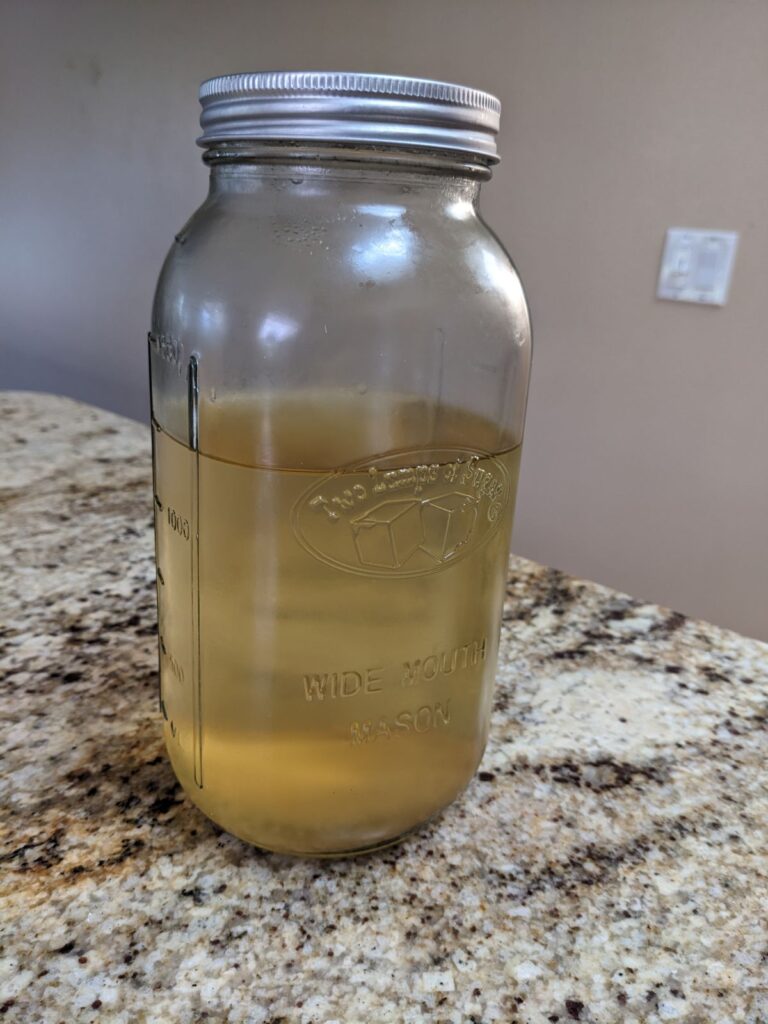
That tea then sits in a dark closet for at least 2 weeks (usually longer) while the SCOBY eats the sugar. After about 2 weeks, I taste it to see if its ready. I don’t have an exact science for it, but I can tell by taste when it gets to where I want it. When it’s ready to bottle, it has a slight effervescence (light a light champagne) with just a hint of sweetness. If it has a vinegar taste, I’ve let it go too long, but I actually still like it a bit tart, so it doesn’t go to waste. I have yet to try much with second fermenting to get flavors added, but that is the next step.
Liquid gold – Kombucha ready to drink!!
Again, looking for a cheap, healthy probiotic – KOMBUCHA! It’s the cost of 2 Tbsp of loose tea and a cup of sugar.
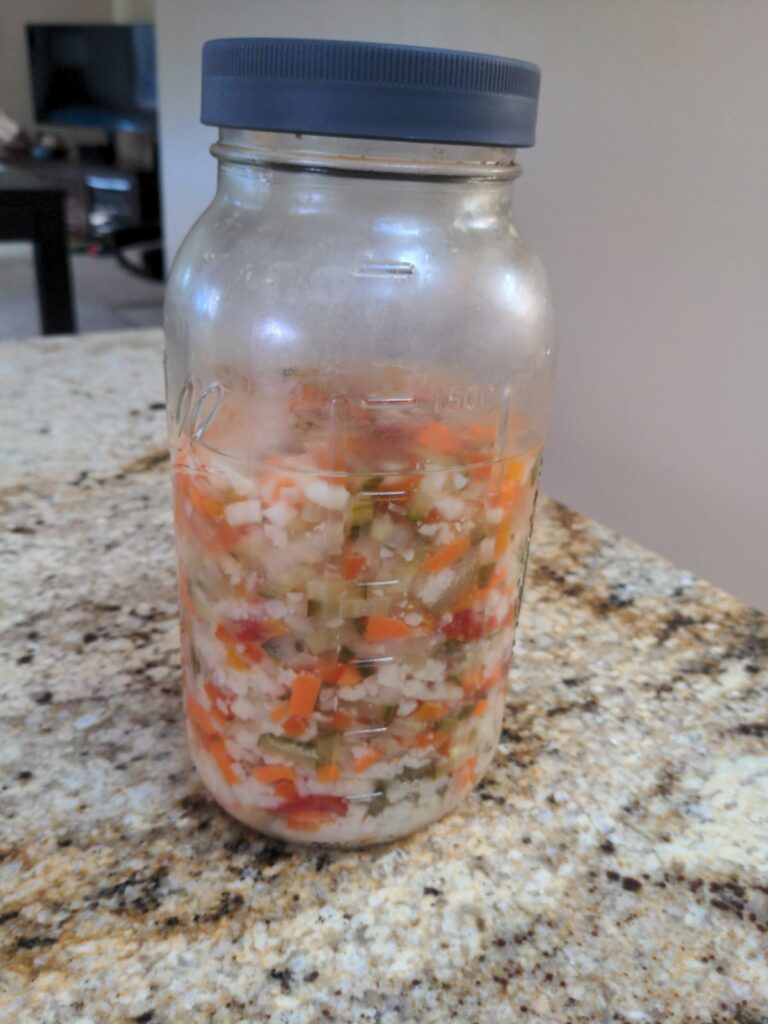
For the fermented vegetables, I used a recipe I received for signing up for a THM coach website (A Joyful Life with KJ). I’ll admit these took several times of eating to actually enjoy them. But I really DO like them! They’re a big mix of vegetables that I put in half gallon mason jars and use fermenting lids* with weights to ferment for a couple of weeks before they were ready.
Fermented vegetables (1 jar was 1/2 the batch)
Again, really good for you, yummy healthy probiotic – FERMENTED VEGETABLES!!!
Did you sense a theme here? The more I learn about health and my own personal health, the more I hear about the importance of a healthy gut. Good, fermented foods are essential to help introduce good bacteria to your body. The standard American diet with ultra-processed foods has us lacking good bacteria and teeming with bad bacteria which causes all kinds of havoc. If you have some gut issues (or even some you wouldn’t associate with your gut), give some good, fermented food a try and see what that does for your health!
*this post contains affiliate links which means I’ll get a small commission if you buy something through one of the links below
Whew what a day it has been and it’s only 2PM!
Summer is here which means it’s backpacking season. I knew I wanted to get some food freeze dried to prepare for upcoming backpacking trips. I have also been changing some dietary things to improve my health and well-being and wanted to do some food prep for that. And finally, it’s the 3rd of July and we have a 4th of July party we’re attending tomorrow, and I need to take food to that.
Wednesdays are my ‘rest’ day from my Barre workouts. For some reason, I woke up an hour early which ended up being just fine. I got up and stripped the bed and the guest bed. Since we’ve been doing some backpacking, our dog sitter has been staying with our boys while we’re gone, so I stripped the bed she uses to wash the sheets. I’m also working on getting a bit more of a routine down and chose Wednesdays as sheets & laundry day.
Next up, I headed downstairs and made my coffee and breakfast – I’ve been incorporating a LOT more veggies and protein with breakfast – of sautéed zucchini, eggs and sausage and berries.
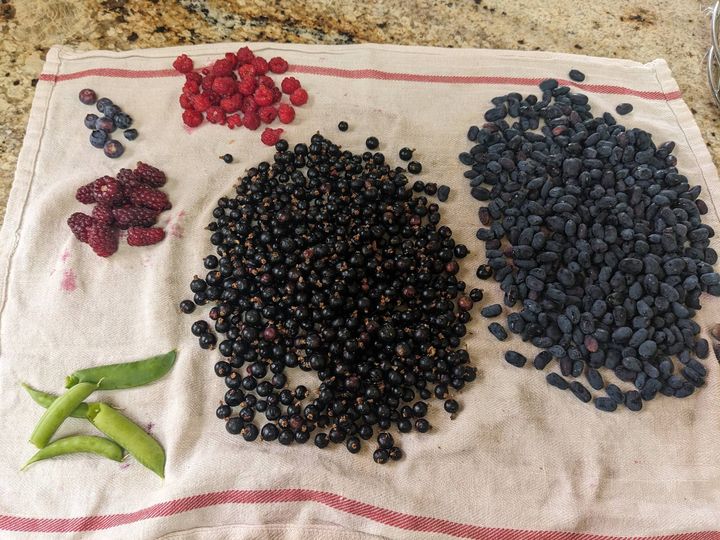
Most mornings this time of year, after breakfast, I head to the backyard with a small colander to harvest whatever is ready. This morning, I picked tayberries, raspberries and blueberries. (The picture below is from a couple days ago.)
Harvest from June 26th (blueberries, raspberries, black currants, honeyberries, a couple of peas and tayberries)
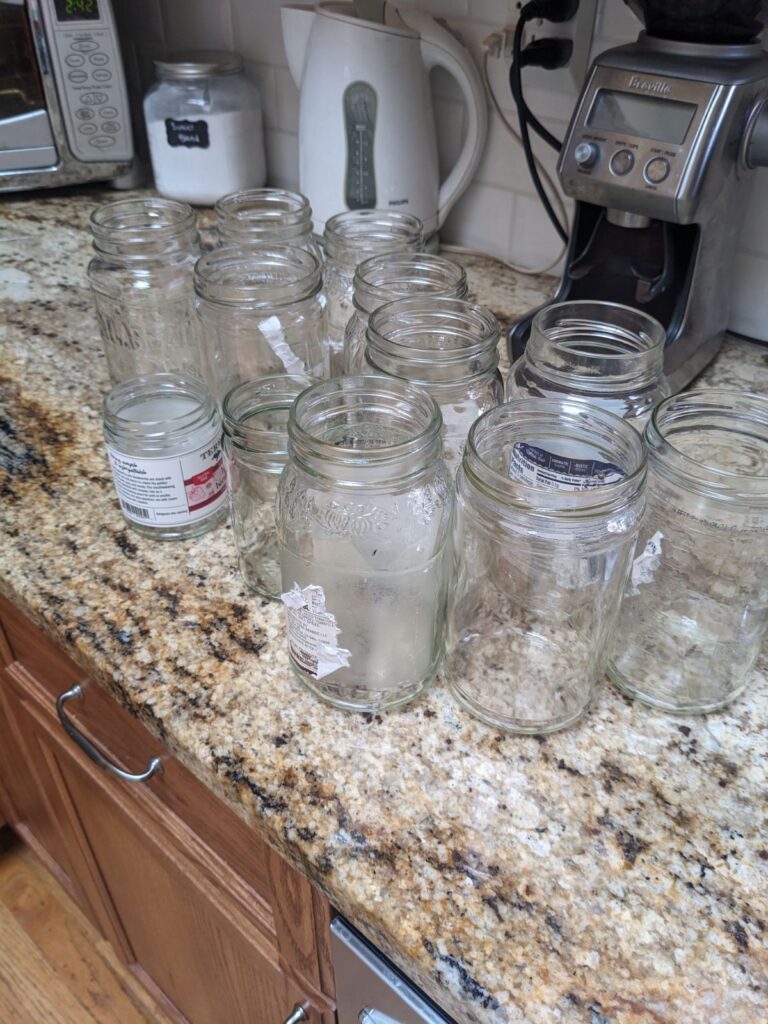
Once I weighed and washed what I picked, I put everything away. I then headed upstairs to change clothes, brush my teeth and head out the door to pick up some free ‘canning jars‘ from Facebook Marketplace.
While I was out, I dropped a card in the mailbox and headed home to get my jars cleaned and ready for use. Well….these were not mason jars unfortunately and I ended up recycling many of them. It’s a good thing they were free! All of the jars were glass, but none of them were actual canning jars. I grabbed a regular and wide mouth lid to see which ones will work.
I usually use a vacuum sealer to seal jars that I store freeze dried foods in. I’ll use these jars for storage and will be able to see very quickly if a jar doesn’t seal.
Goo Gone is needed get these jars cleaned up. I prefer nice, clear, no residue jars.
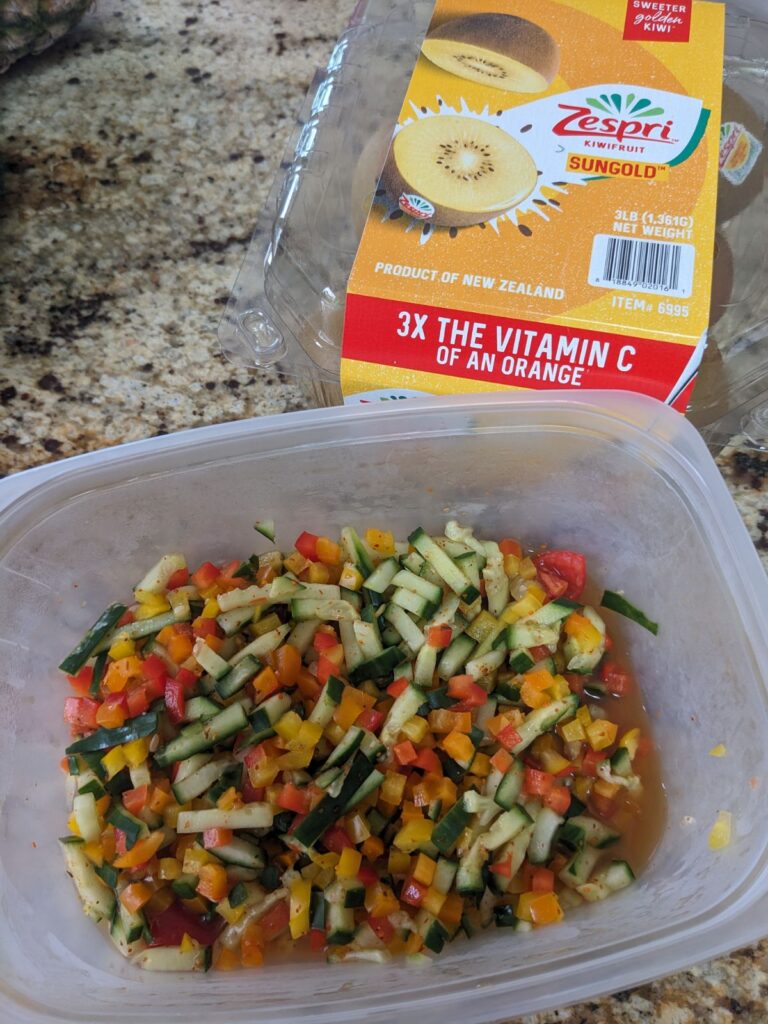
Next up was to make up a salad I’ve been enjoying recently. It’s a very simple recipe of cucumbers, bell peppers, lime juice, salt & Tajin.
I recently freeze dried some to bring along as a cold soak lunch while backpacking. (Most freeze-dried meals require boiling water to heat up and rehydrate which you eat a hot meal. A cold soak means you add the desired amount of water to the container and leave the food to rehydrate over several hours. Its ready to eat later on as a cold meal.) I added some chicken that I had freeze dried last season to add some protein to my lunch. I loved it!! For our trip last weekend, I made up a couple of those for us to take along and we both loved it!
Today, I made up a large batch of this salad to freeze dry (probably 8 servings worth). I didn’t have quite enough to fill the third tray in the machine, so decided to only freeze dry 2 trays and save the rest to eat this week.
I then cut up 3 kiwis to fill the third tray in the freeze dryer. I did kiwi last year, but we ate it for the first time this past weekend while in camp. We loved it and our friends loved it too. Once we were back, I made sure to pick up more kiwi to get more freeze dried for future snacking!
salad and kiwi
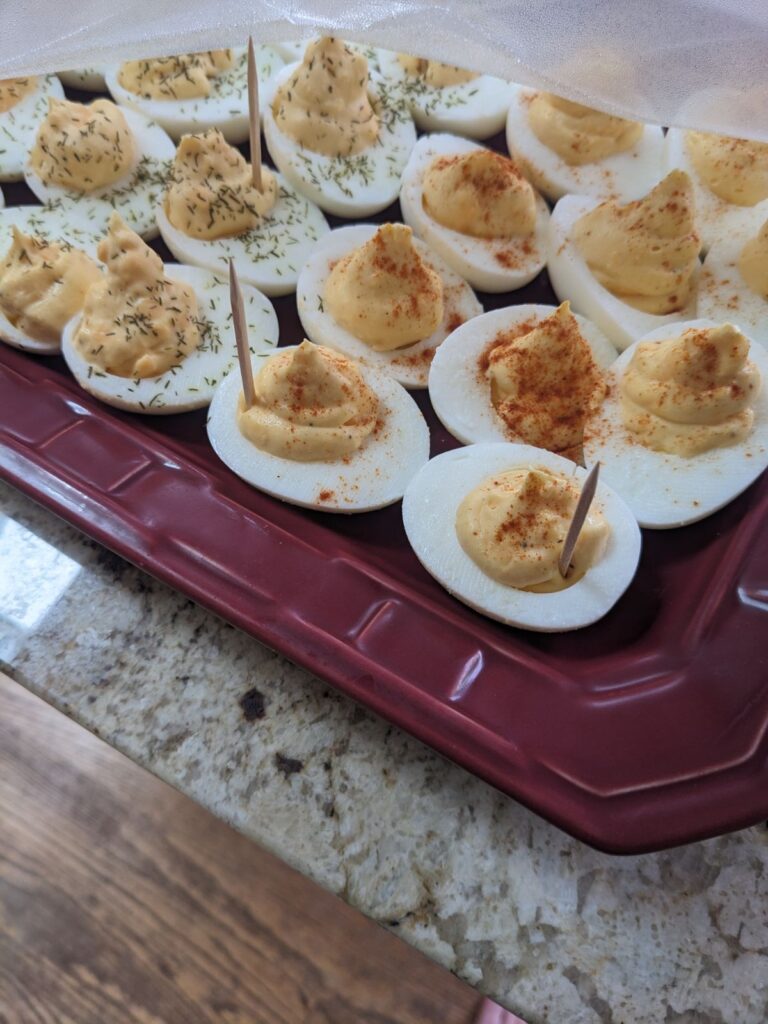
I turned on the freeze dryer, set a timer for 15 minutes while it cools down the inside of the machine and got some water boiling to make deviled eggs.
I sat down for a few minutes to read a few pages in a book while waiting for both things to be ready.
After15 minutes, the food went into the freeze dryer and I headed to the stove and dropped in a dozen eggs to boil. I got out a big bowl and filled it with ice water for the eggs once their 12 minutes of boiling finished. (It’s easier to peel the eggs if they’ve cooled down and a big bowl of ice water speeds that up!)
I’m bringing deviled eggs to a friend’s party tomorrow for the 4th!
In the midst of doing these various tasks, I decided to refill the dishwasher detergent jars – washing soda and citric acid. Refilling those jars led me to check if other jars needed to be refilled. I went through the bulk spices I have and refilled the spice jars too.
(Having a small flexible silicone funnel makes that job easier! I bought mine years ago from Pampered Chef, but this set is very similar)
Once the eggs cooled, I turned them into deviled eggs. When I was a kid, I got a paperback trio of cookbooks that I still have. I used the Fanny Farmer cookbook recipe for the deviled eggs and sprinkled paprika on about half and dill on the other half.
By the time I finished all of that, it was time to sit down and have lunch! Whew, what a morning.
Now, on to make remake the beds and mix up some cookie dough to bake in the morning before we head to the 4th of July party!
(This post contains affiliate links which means if you purchase something through this link, I’ll make a few cents)
I started a new hobby this past winter and have continued as I wait for spring and all of the outdoor activities to begin – embroidery. Now that the outdoor activities have begun, I’ve set this aside for now, but am enjoying using these tea towels.
Embroidery is a quick, easy thing to occupy my hands in the evenings while watching TV.
When I was younger, I did counted cross-stitch and because of having that experience, it helped make embroidery much easier to pick up.
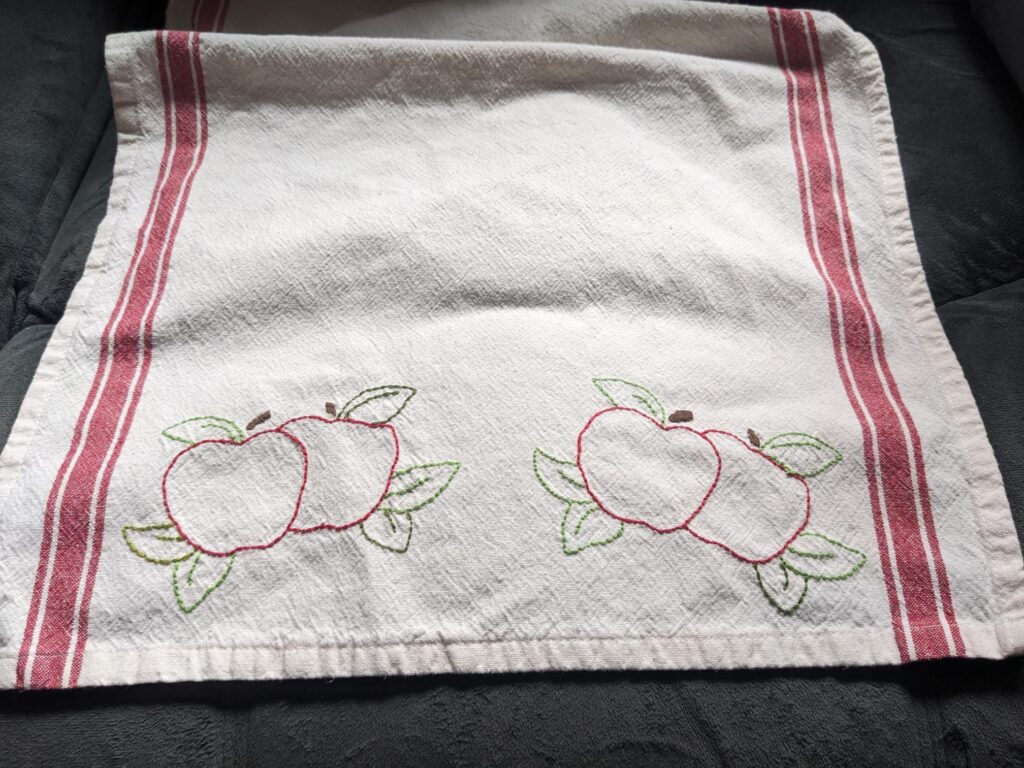
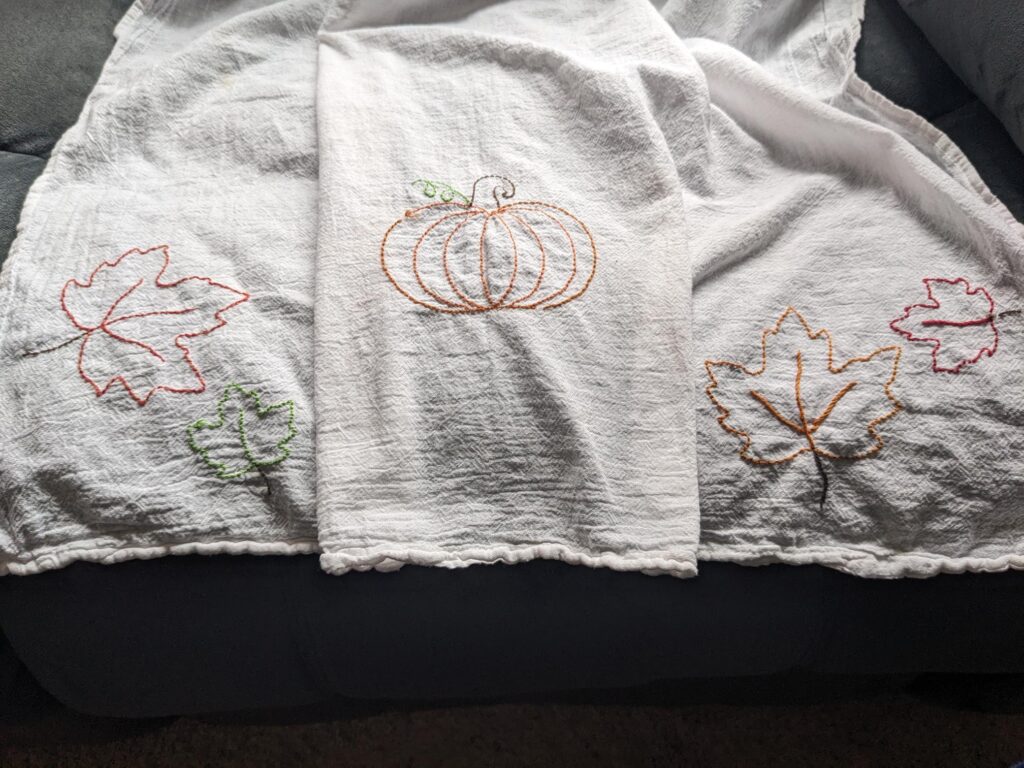
I picked up some embroidery books from the library for ideas, have hand drawn a couple of the patterns and use quilt patterns (something like these) to draw on the towels.
Here’s how I did it: 1) Start with a laundered cotton or linen towel.
2) Using a washable pen or pencil (I have a couple specific for quilting and used those), draw a pattern onto the towel. If you’re using a pattern from a book, you’ll have to place the pattern under the towel and then trace it thru the fabric. (If you can tape it up to a window or have a light box, that would make things a LOT easier). If you’re using a quilting pattern, set it on top of the towel and draw the pattern on the fabric.
3) Start stitching.
For the books I got from the library, I took a picture of the instructions page so I could reference back to it after I’d returned the book. That also worked great in taking some embroidery on vacation and packing just needles, thread, small scissors, hoop and towel.
Here are a few of the towels I’ve finished:
Butterfly, dandelion and dragonflyApplesFall leaves and pumpkin
I have a few ideas for future towels, but I also need to have somewhere to use them 😉
(This post contains affiliate links which means if you purchase from my link, I will make a few cents)
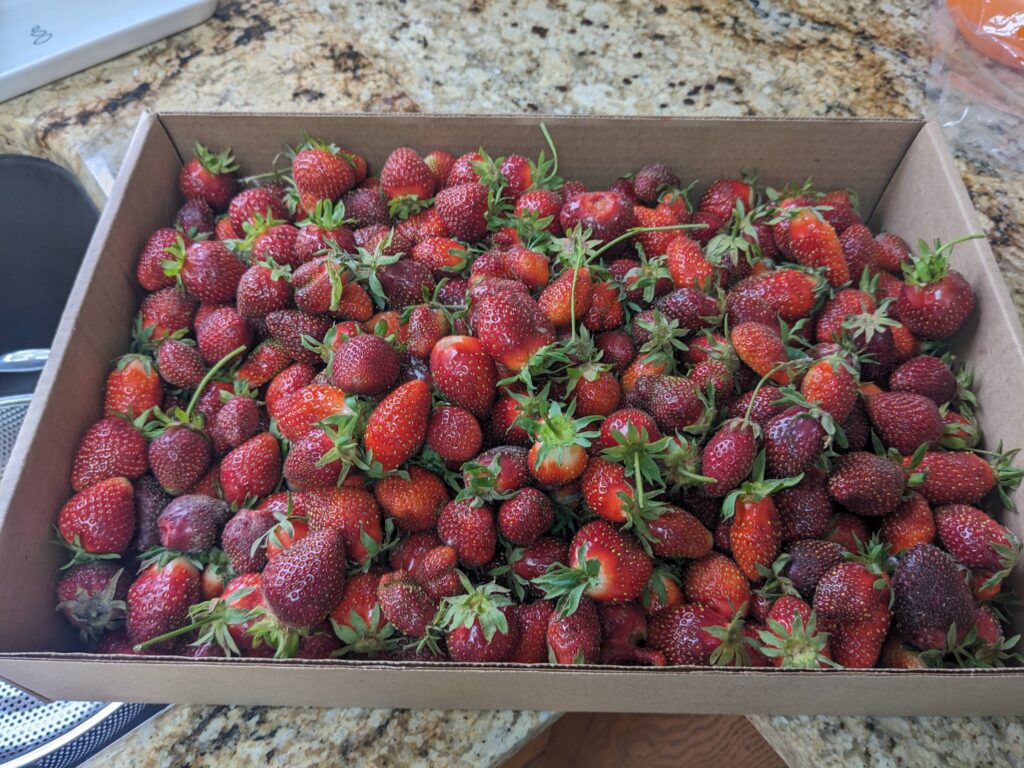
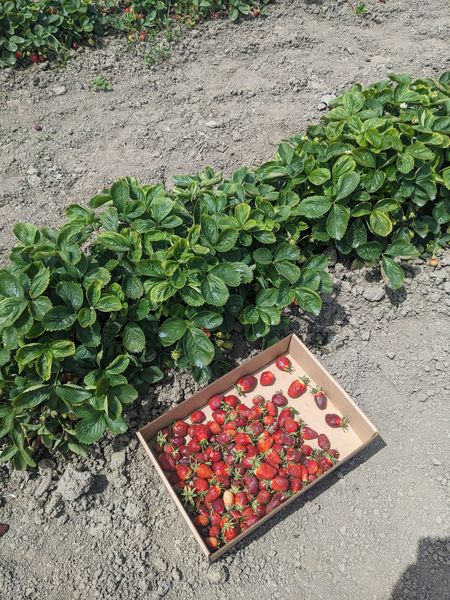
It’s strawberry season here in the PNW. I’m very thankful for a u-pick farm nearby that has a variety of things I can pick. While they aren’t certified organic, they practice clean farming practices which we appreciate.
I picked about 8ish pounds and brought them home, cleaned them up, sorted them and got to thinking about all that I going to do with them.
First up, EAT them! Strawberries are do delicious. Growing up, I wouldn’t touch them! I’m so glad my tastebuds changed in adulthood, and I tried them again.
I sorted the berries and separated the ones that are the ripest. (Some are almost purple, they’re so dark red!!) We’ll eat those tonight or tomorrow morning and whatever is left of those will go into jam.
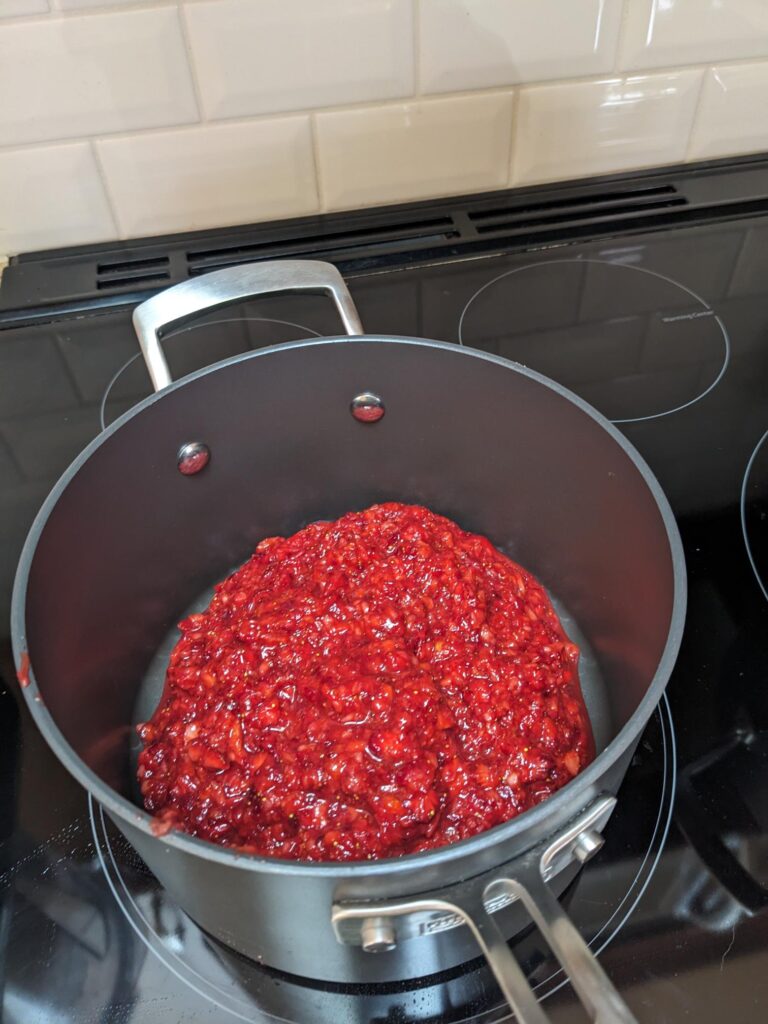
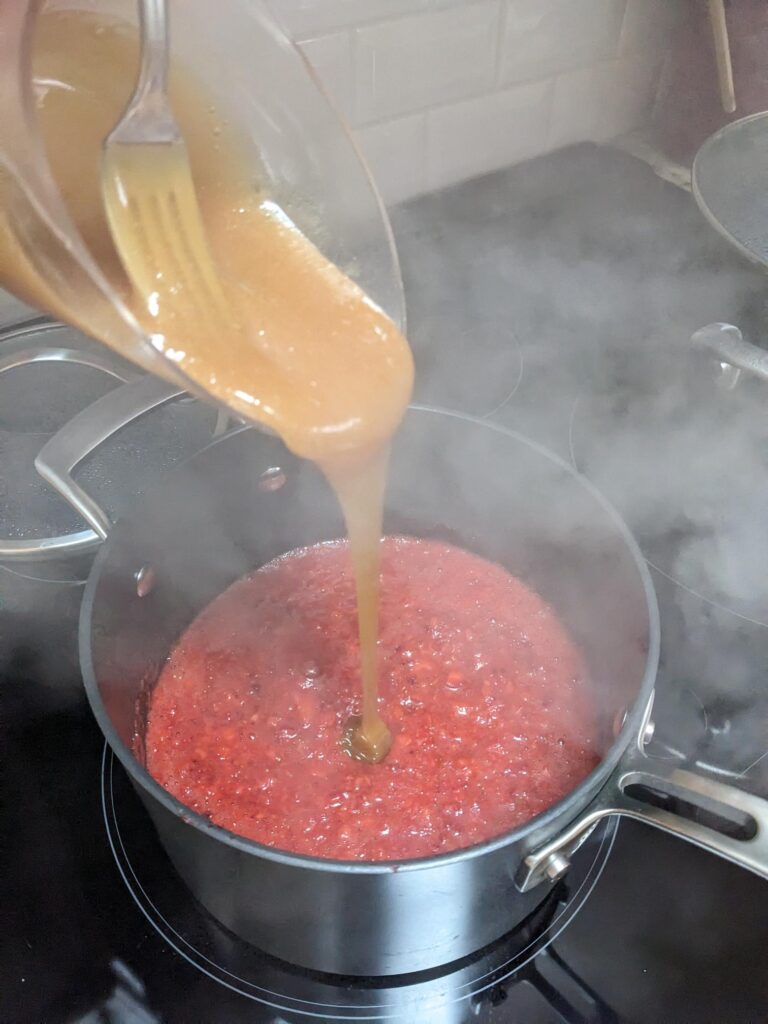
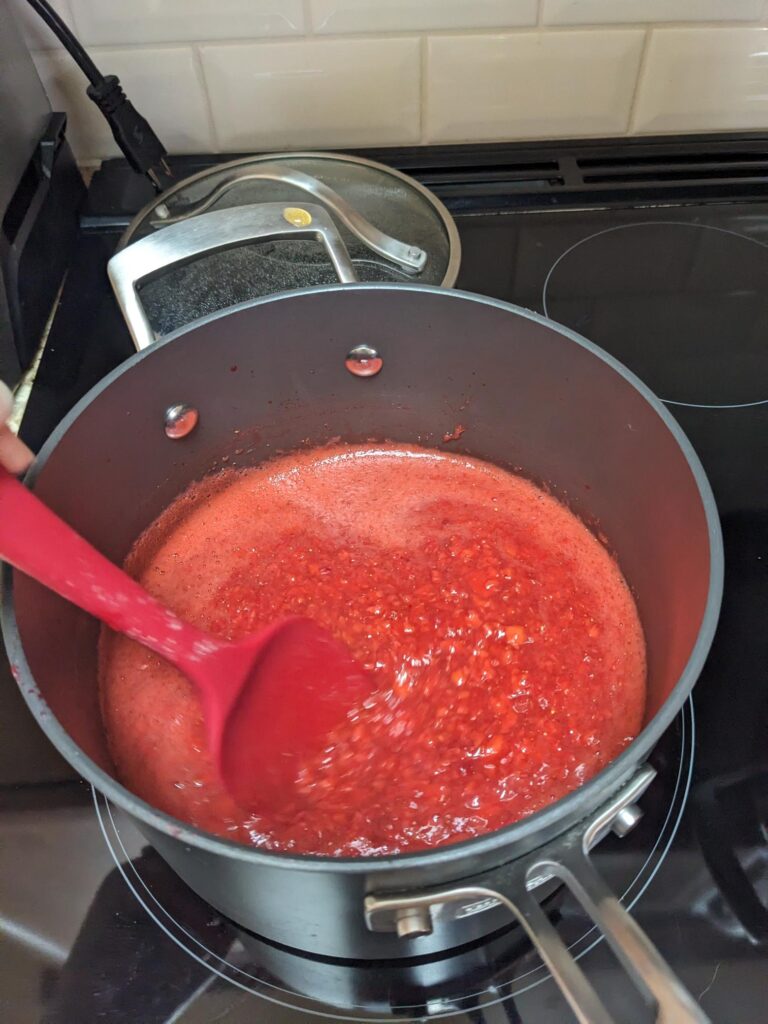
Next up, make jam! 😛 I use Pomona Pectin which is a no-sugar/low-sugar pectin and uses calcium to activate the pectin rather than sugar. I tend to use a bit of honey for just a hint of sweetness (½ cup for the whole batch of jam).
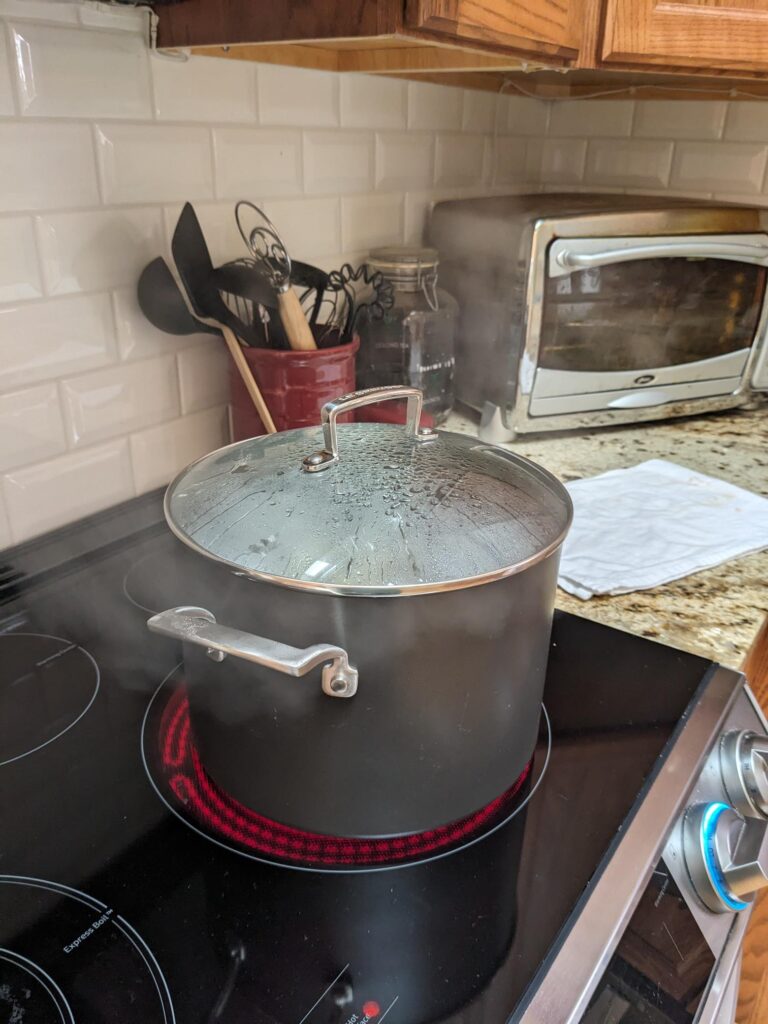
Mashed BerriesAdding honey w/pectinBringing to a boilWater Bath
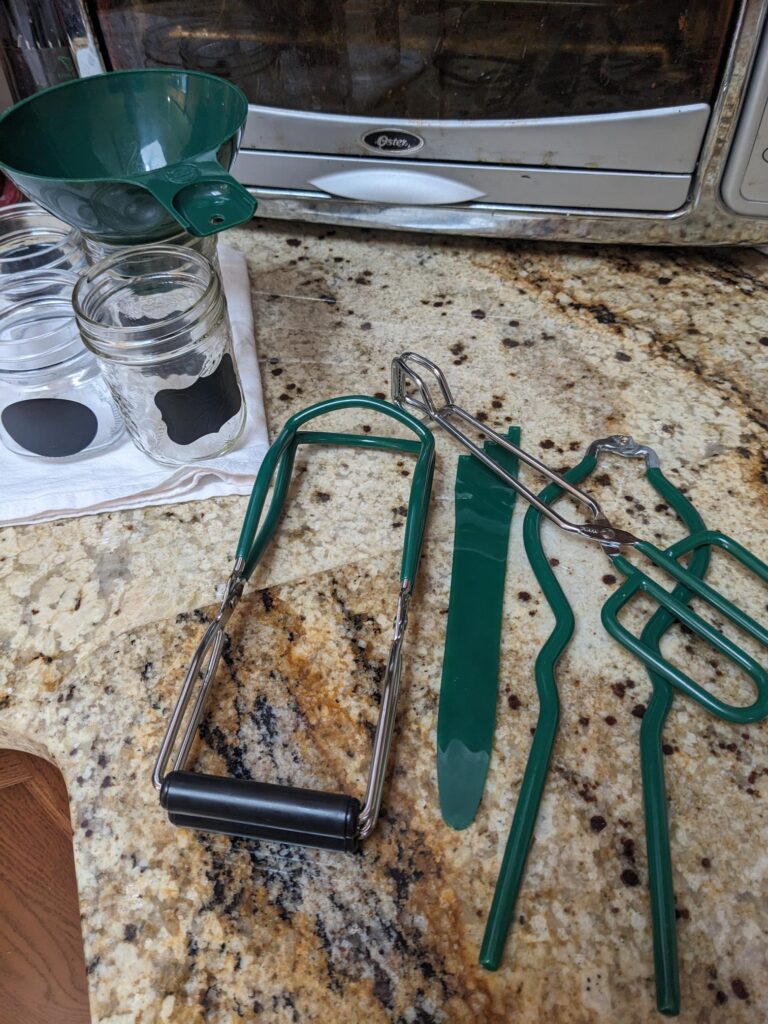
I love this set of canning tools (see picture below) which helps when it comes to not burning fingers on boiling hot items!! You’ll also need canning jars. You can buy brand new with lids & rings. Or you can buy the jars, rings and lids all separate.
Every time I can, I LOVE that ping of the jar sealing when it comes out of the water bath. I took a video and you can hear the ping, but it’s more of a ‘pong’ because the phone must have been a bit too close. LOL
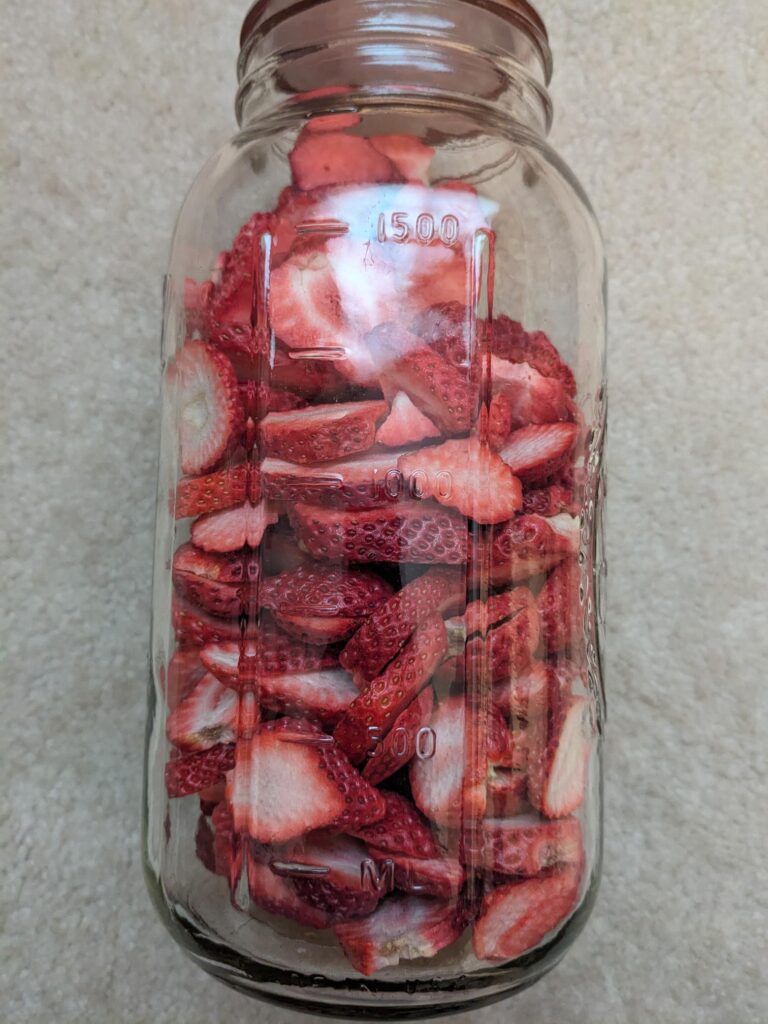
Third way to use them, freeze dry them. As I’ve previously posted, we have a Harvest Right freeze-dryer which I use to make shelf-stable, dried foods that are ultra-lightweight for backpacking. Freeze dried strawberries are delicious. They work great to break up and throw into oatmeal but are also great to eat by themselves as a snack. I love having freeze dried fruit on hand.
(I store a lot of my freeze-dried food in mason jars as I’m not doing this for long-term storage. There’s less waste with not throwing out a mylar bag every time I need to repackage something to take backpacking. I love these half-gallon mason jars! I use these jar sealers that I use with our Foodsaver accessory vacuum sealer)
Lastly, I’ll freeze some that we can use in smoothies or other things throughout the winter. (Nothing like a taste of summer in the cold of winter.) Last year, we bought a stand-up deep freeze that we keep in the garage. I have loved having fruits, vegetables and meat in the freeze to ‘shop’ from when it’s time to think about what to make for meals. I have one bag of raspberries left from last year and about a half bag of diced apples from last season.
As it is still early in strawberry season, I’m sure I’ll go out to the u-pick farm at least once more. (The farm has about 7 varieties of strawberries and only the first two were ripe when I went today.)